

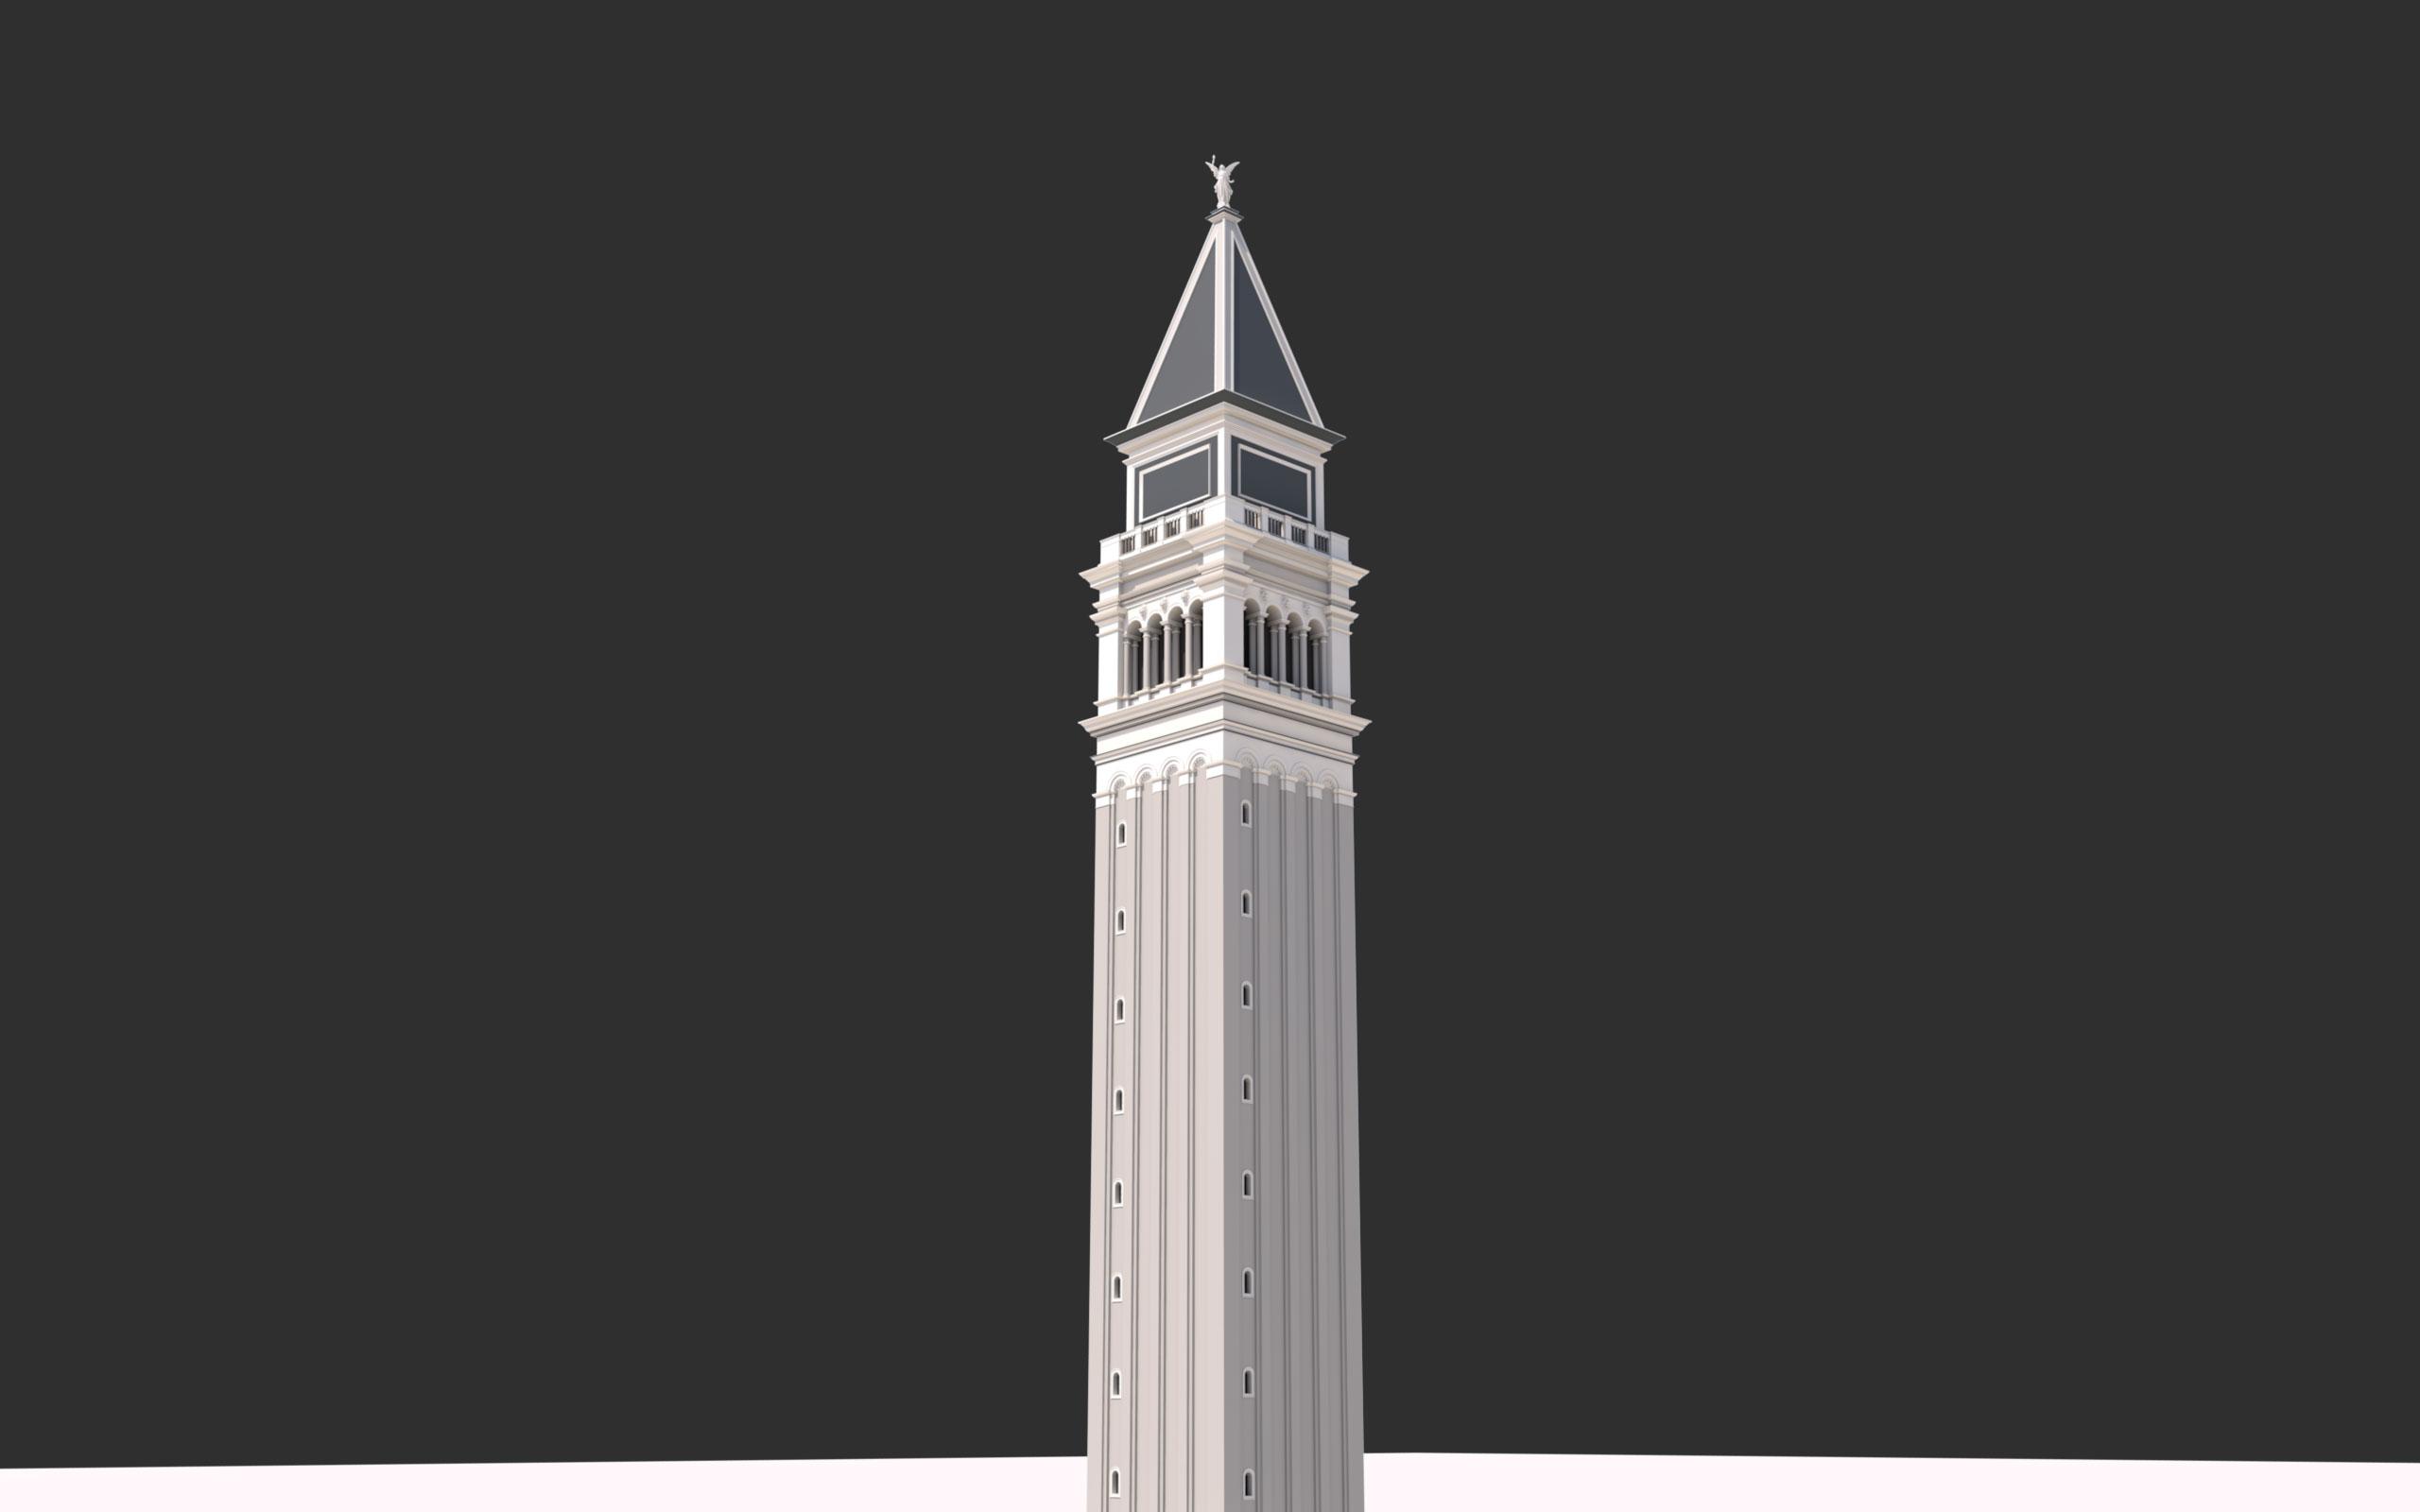
In Venice, Italy there is a pretty neat, historic tower in St. Marks Square named “St. Mark’s Campanile”. We decided to make it in Cinema4D for no real reason at all.
Disclaimer : For the sake of not writing a book, I am assuming you are familiar with C4D. Beginners could get through it — only hard part might be finding the tools I’m talking about. Other then that, it’ll be more of a tedious process.
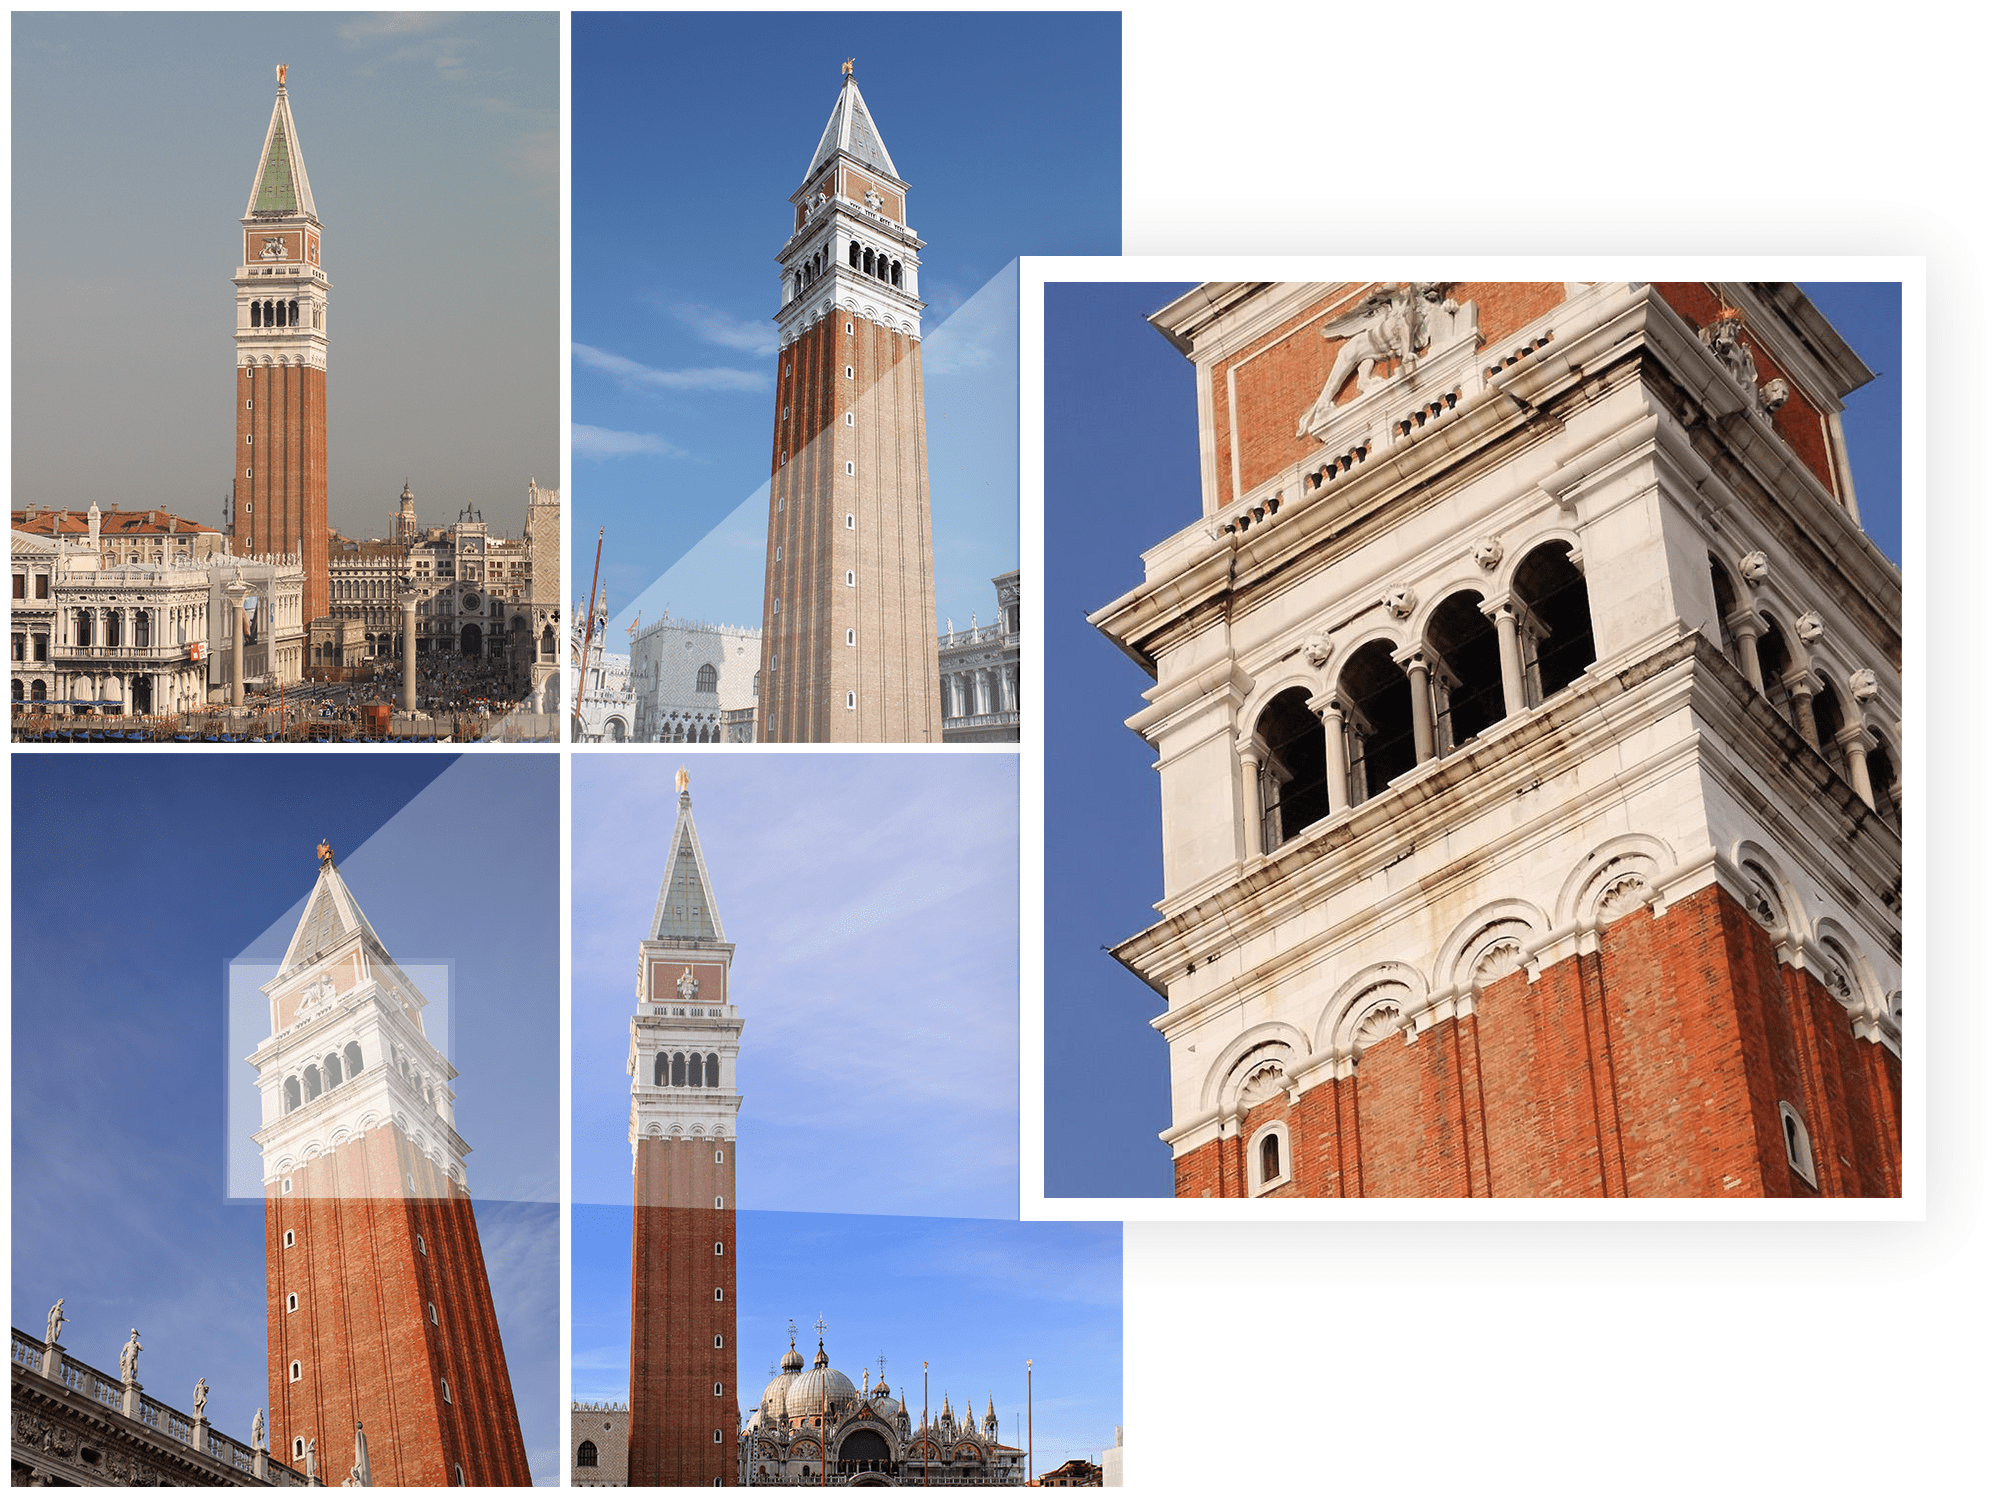
Step One : Find high Resolution Images
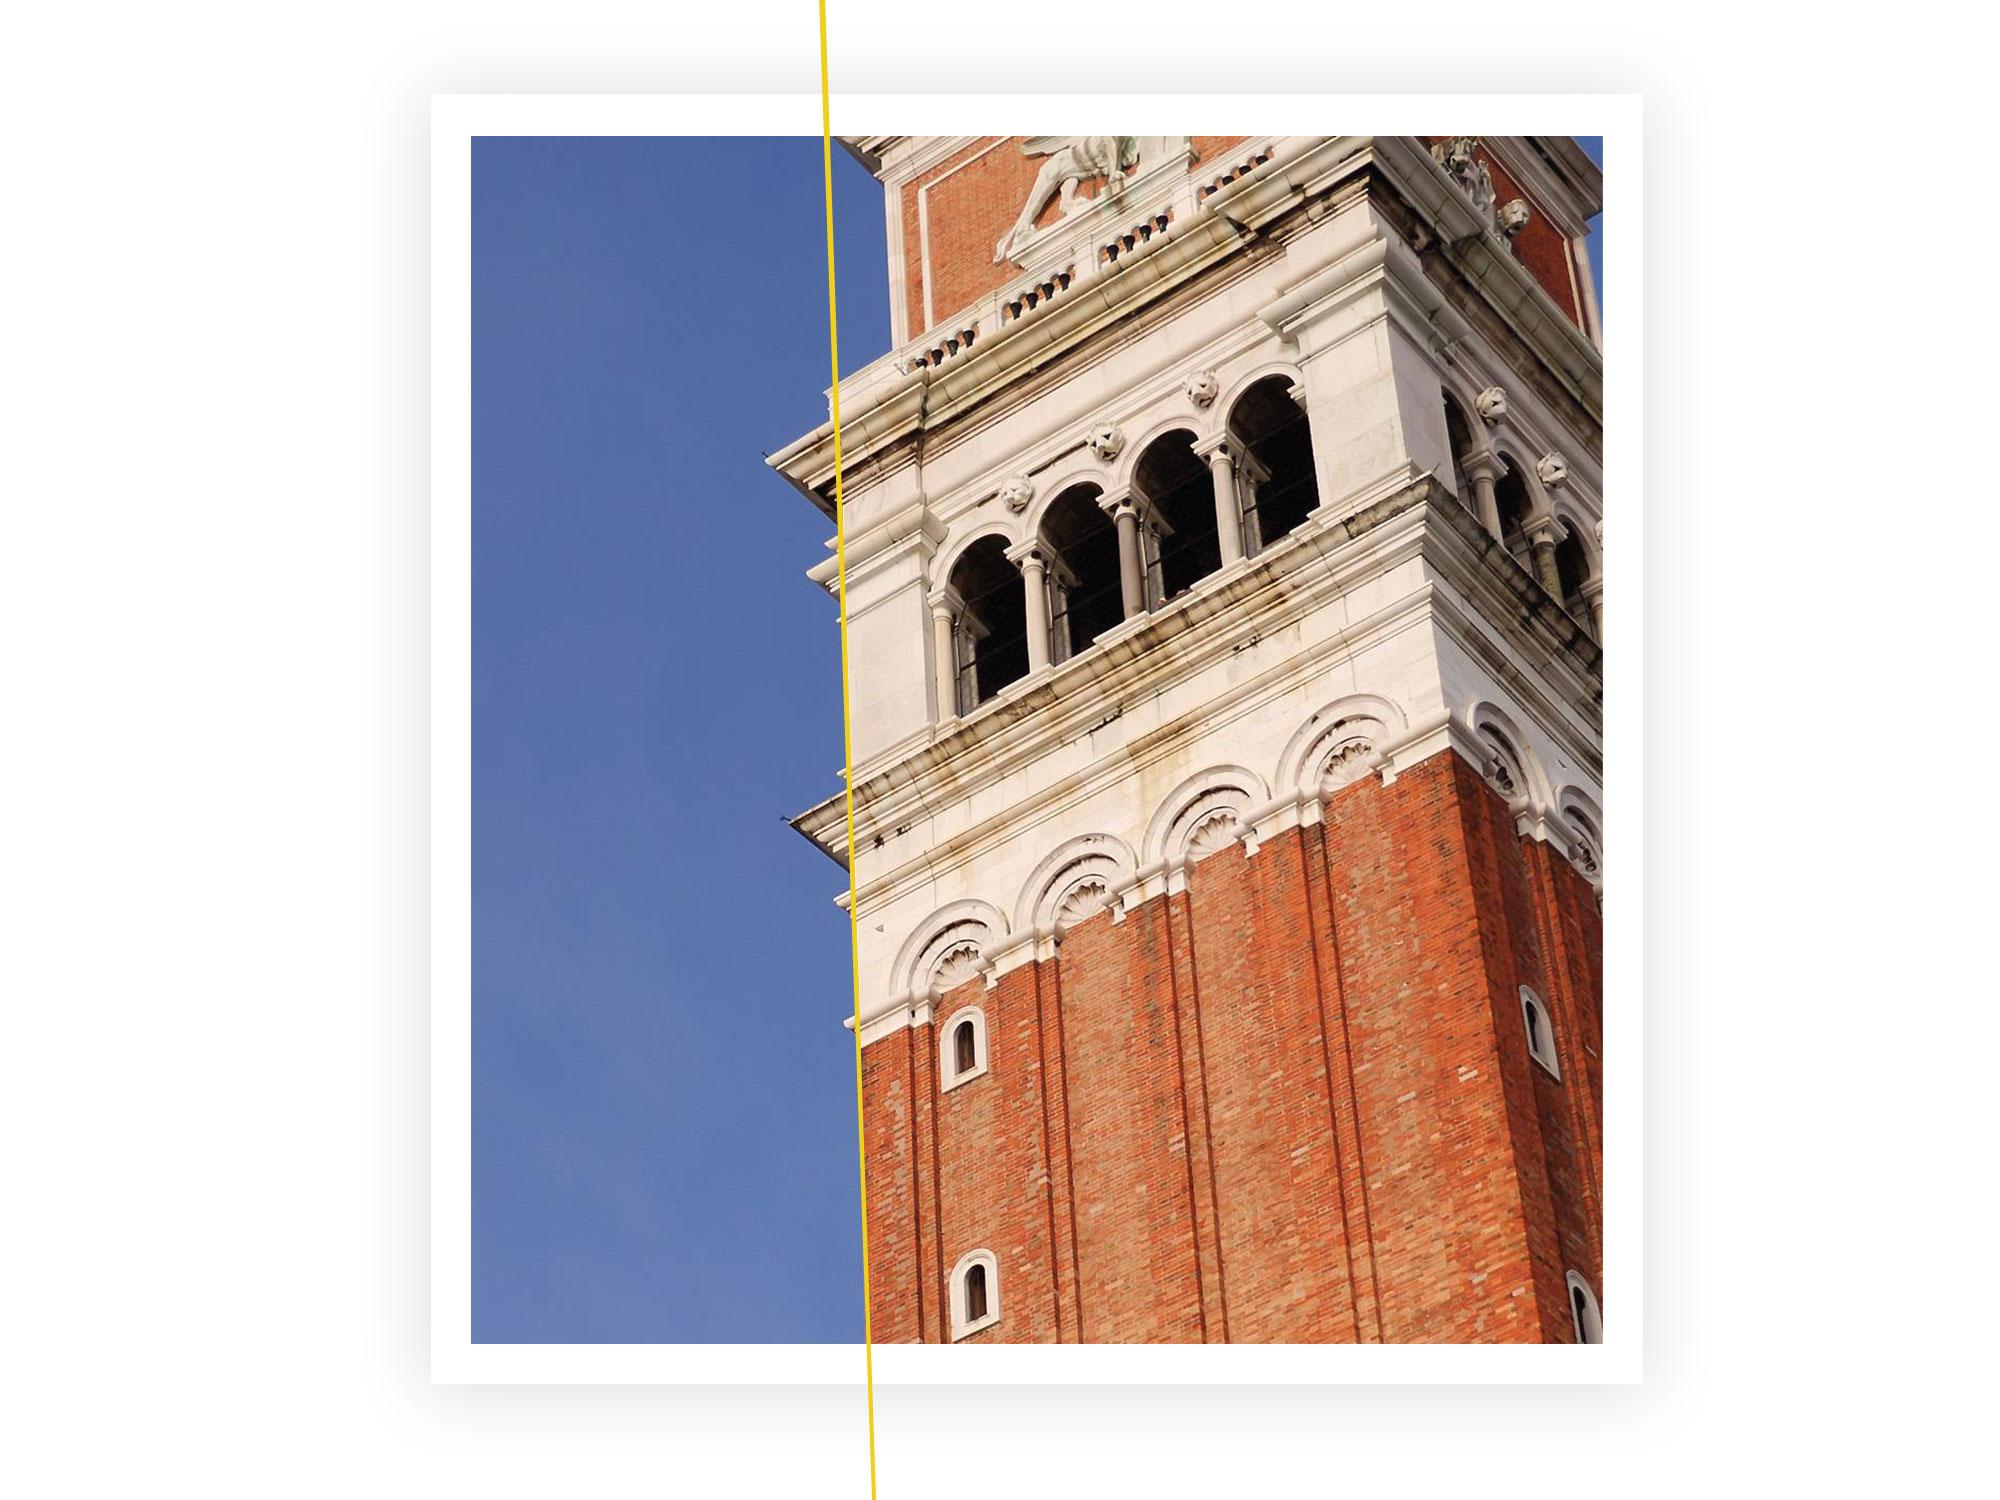
The nice thing about this structure is that it is symmetrical — every side is designed the same, with the exception of the decorative detail way up high. For this blog post, I’m not good enough to sculpt crazy lions I don’t have the time to do all the decorative work. This tower will be pretty basic in the sense that we’ll only be using basic geometric shapes. The most important thing that matters is having high resolution images of all sides so that we can see all the detail as close as possible. In the example below, we can see the exact number of geometric shapes that are essentially stacked on top of one another.
Step Two : Building from the bottom up
I didn’t look online for blueprints or any sort of dimensions Since we can’t find any blueprints or dimensions online, we’re going to have to wing it a lot on this one — you’ll just have to trust yourself that you’re making the right decisions in terms of overall sizes of objects that make up the tower. Luckily, it’s a square. Don’t screw it up.
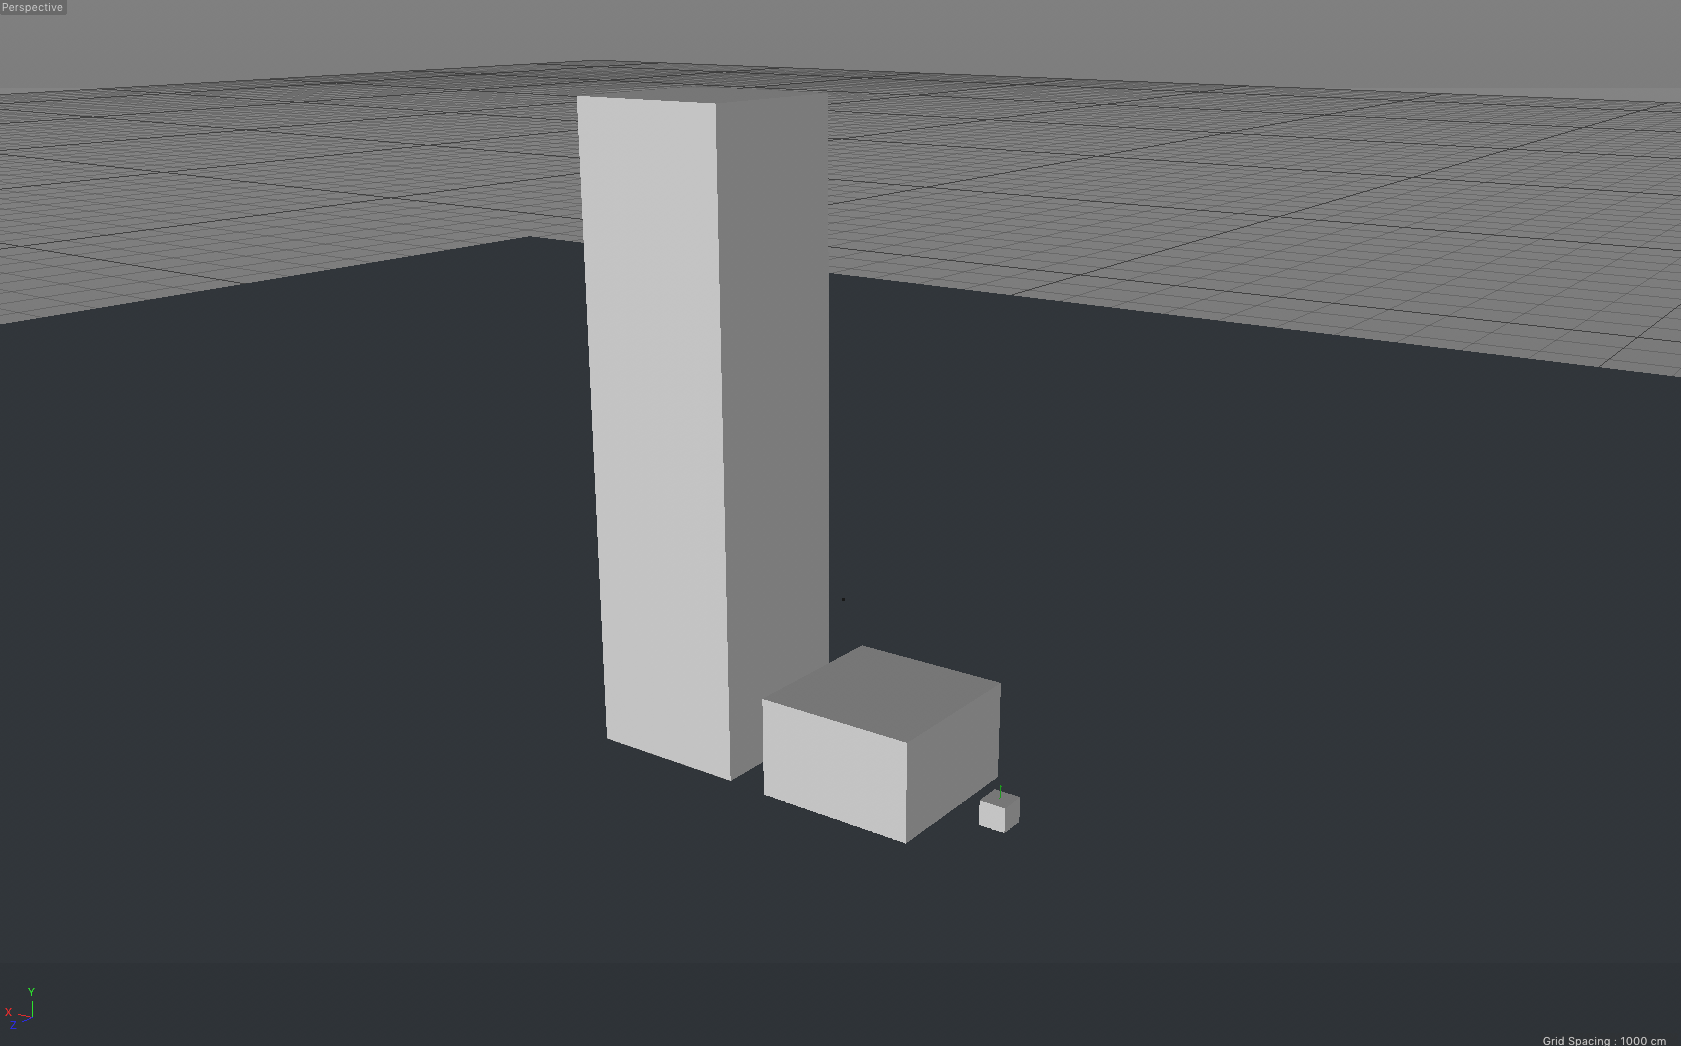
Create the base — start with a square that you can find the in the toolbar, expand until it’s substantially bigger and then, once you feel it’s in a good spot, scale it up vertically. You’ll have to eyeball the height based on your reference images but mine came out to:
X = 999px, Y = 4730px, Z = 1019px
Next, we’ll create the walls. Looking at our reference images we notice a few things: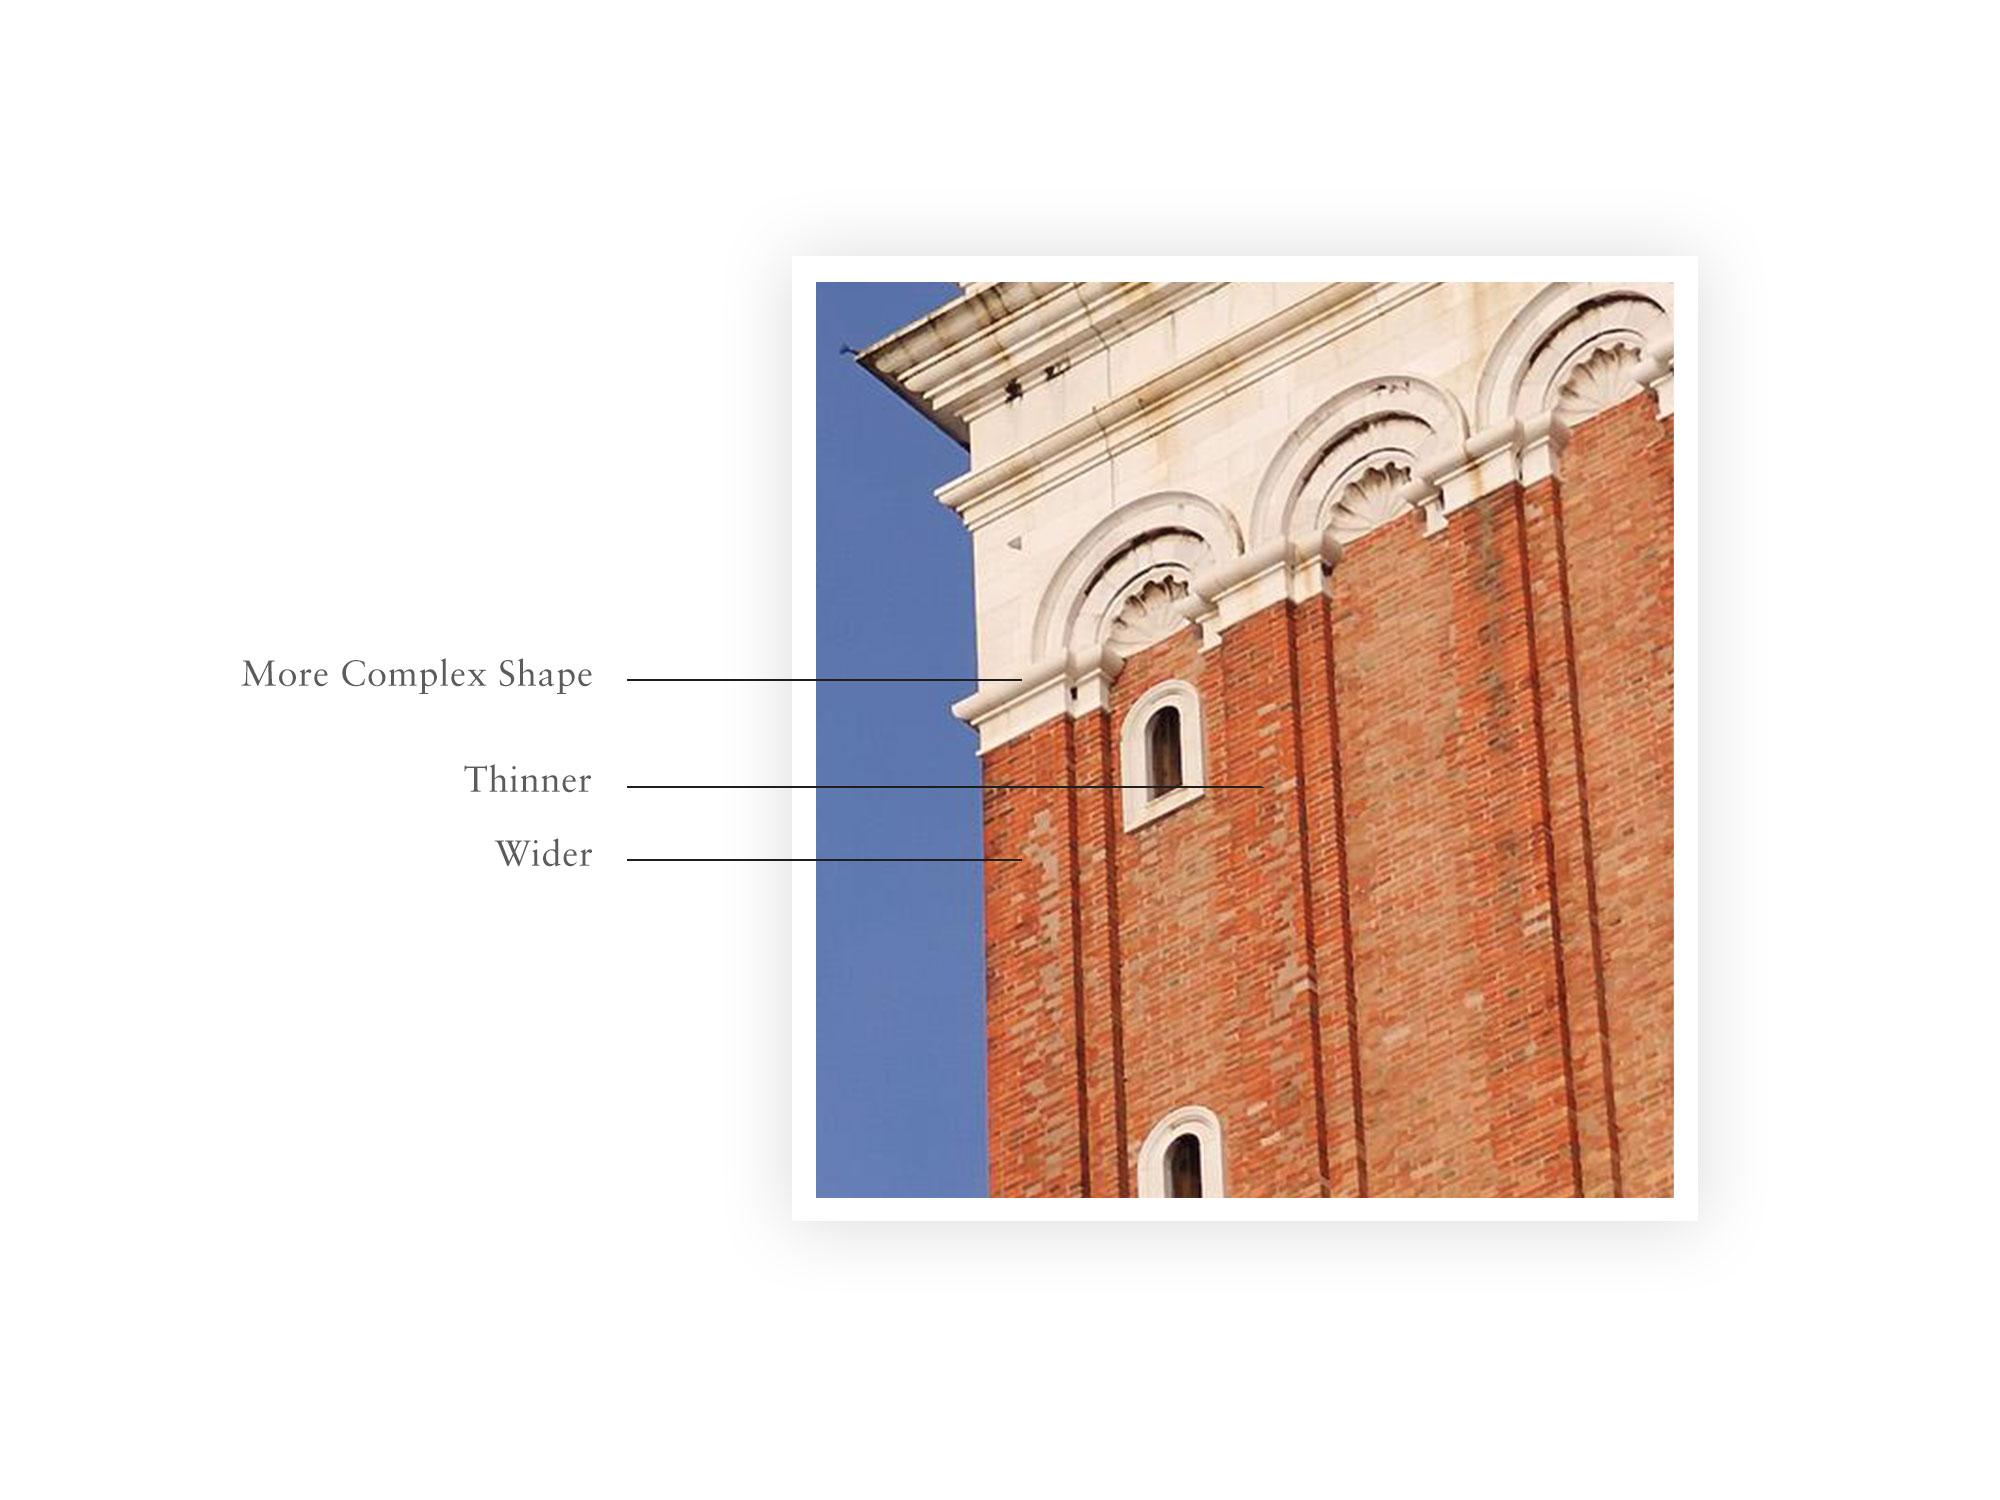
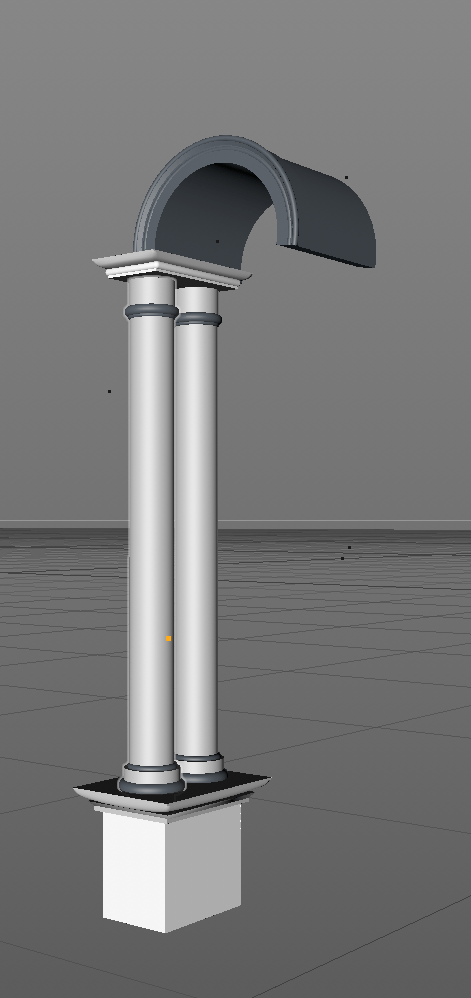
To create the more complex shape that is common throughout the whole tower, we need to start with an arc curve found in the menu under the “pen” tab. After that is created, we need to put that into a lathe nurb, rotate the shape 180 deg (X axis), -45deg (Y axis) and reduce the subdivision to 4 so that it only has four sides. After that you’ll have to morph it until it looks similar to the example below. Hint: It’s easier to select the “arc” under the lathe nurb and scale the Y axis. That process looks like this:
Using cubes, morph them to match the model below and then stack the curve shapes we just made on top of them (you’ll have to edit them since they are now becoming a rectangular shape). Obviously, these cube shapes need to be as tall as the base cube. Remember that the ends are wider than the columns in the middle. Also, I am just checking the “fillet” box on my cubes to create the “divider” pieces.
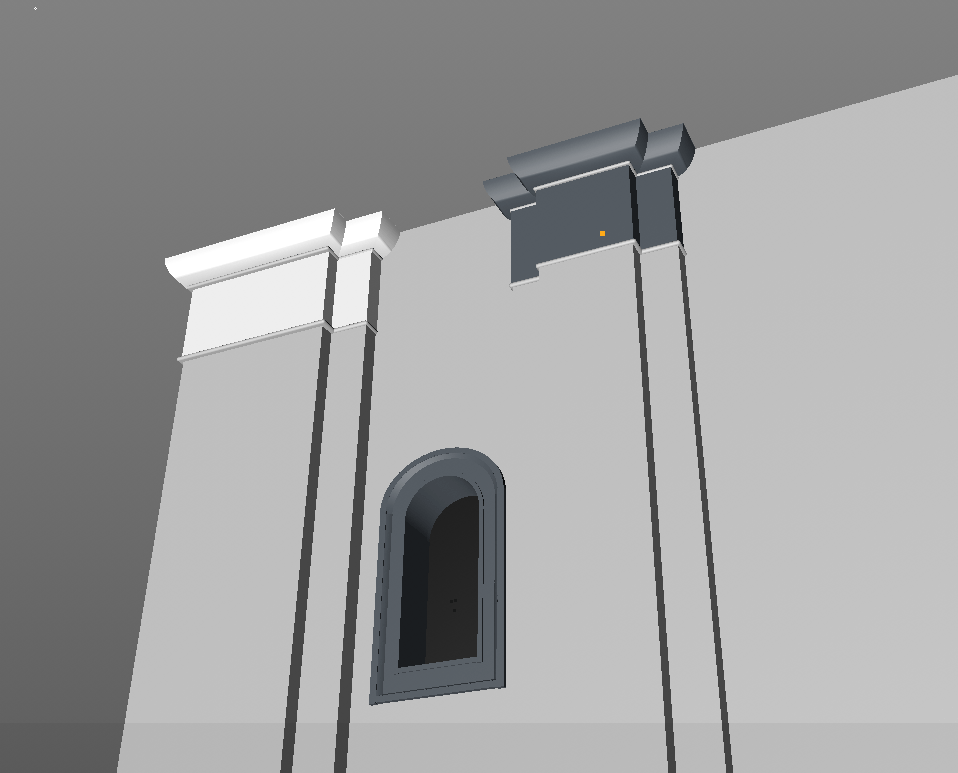
The nice thing is that we only have to create these columns once and just use the cloner tool to make it look like we did a lot more work then we actually did. Heck yeah. You can find that sucker under the “MoGraph” tab and it’s called “Cloner.” I used the cloner tool three times here — once for the end piece that I will clone once so that it will go on the other end, another for the skinner middle columns, which I will clone two times, and one for the windows which I will clone 7 times. A cool trick that will save you a lot of time — once you grouped your layers and nested it into the Cloner layer — click both layers (cloner and object), navigate the tool bar to “Mesh” > “Axis Center” > “Center Parent To.” This will automatically bring the cloner to the object we just made instead of having to manually do it. Space it out good but don’t worry too much, the arches we make next will help us with the right spacing. You should end up with something similar as below.
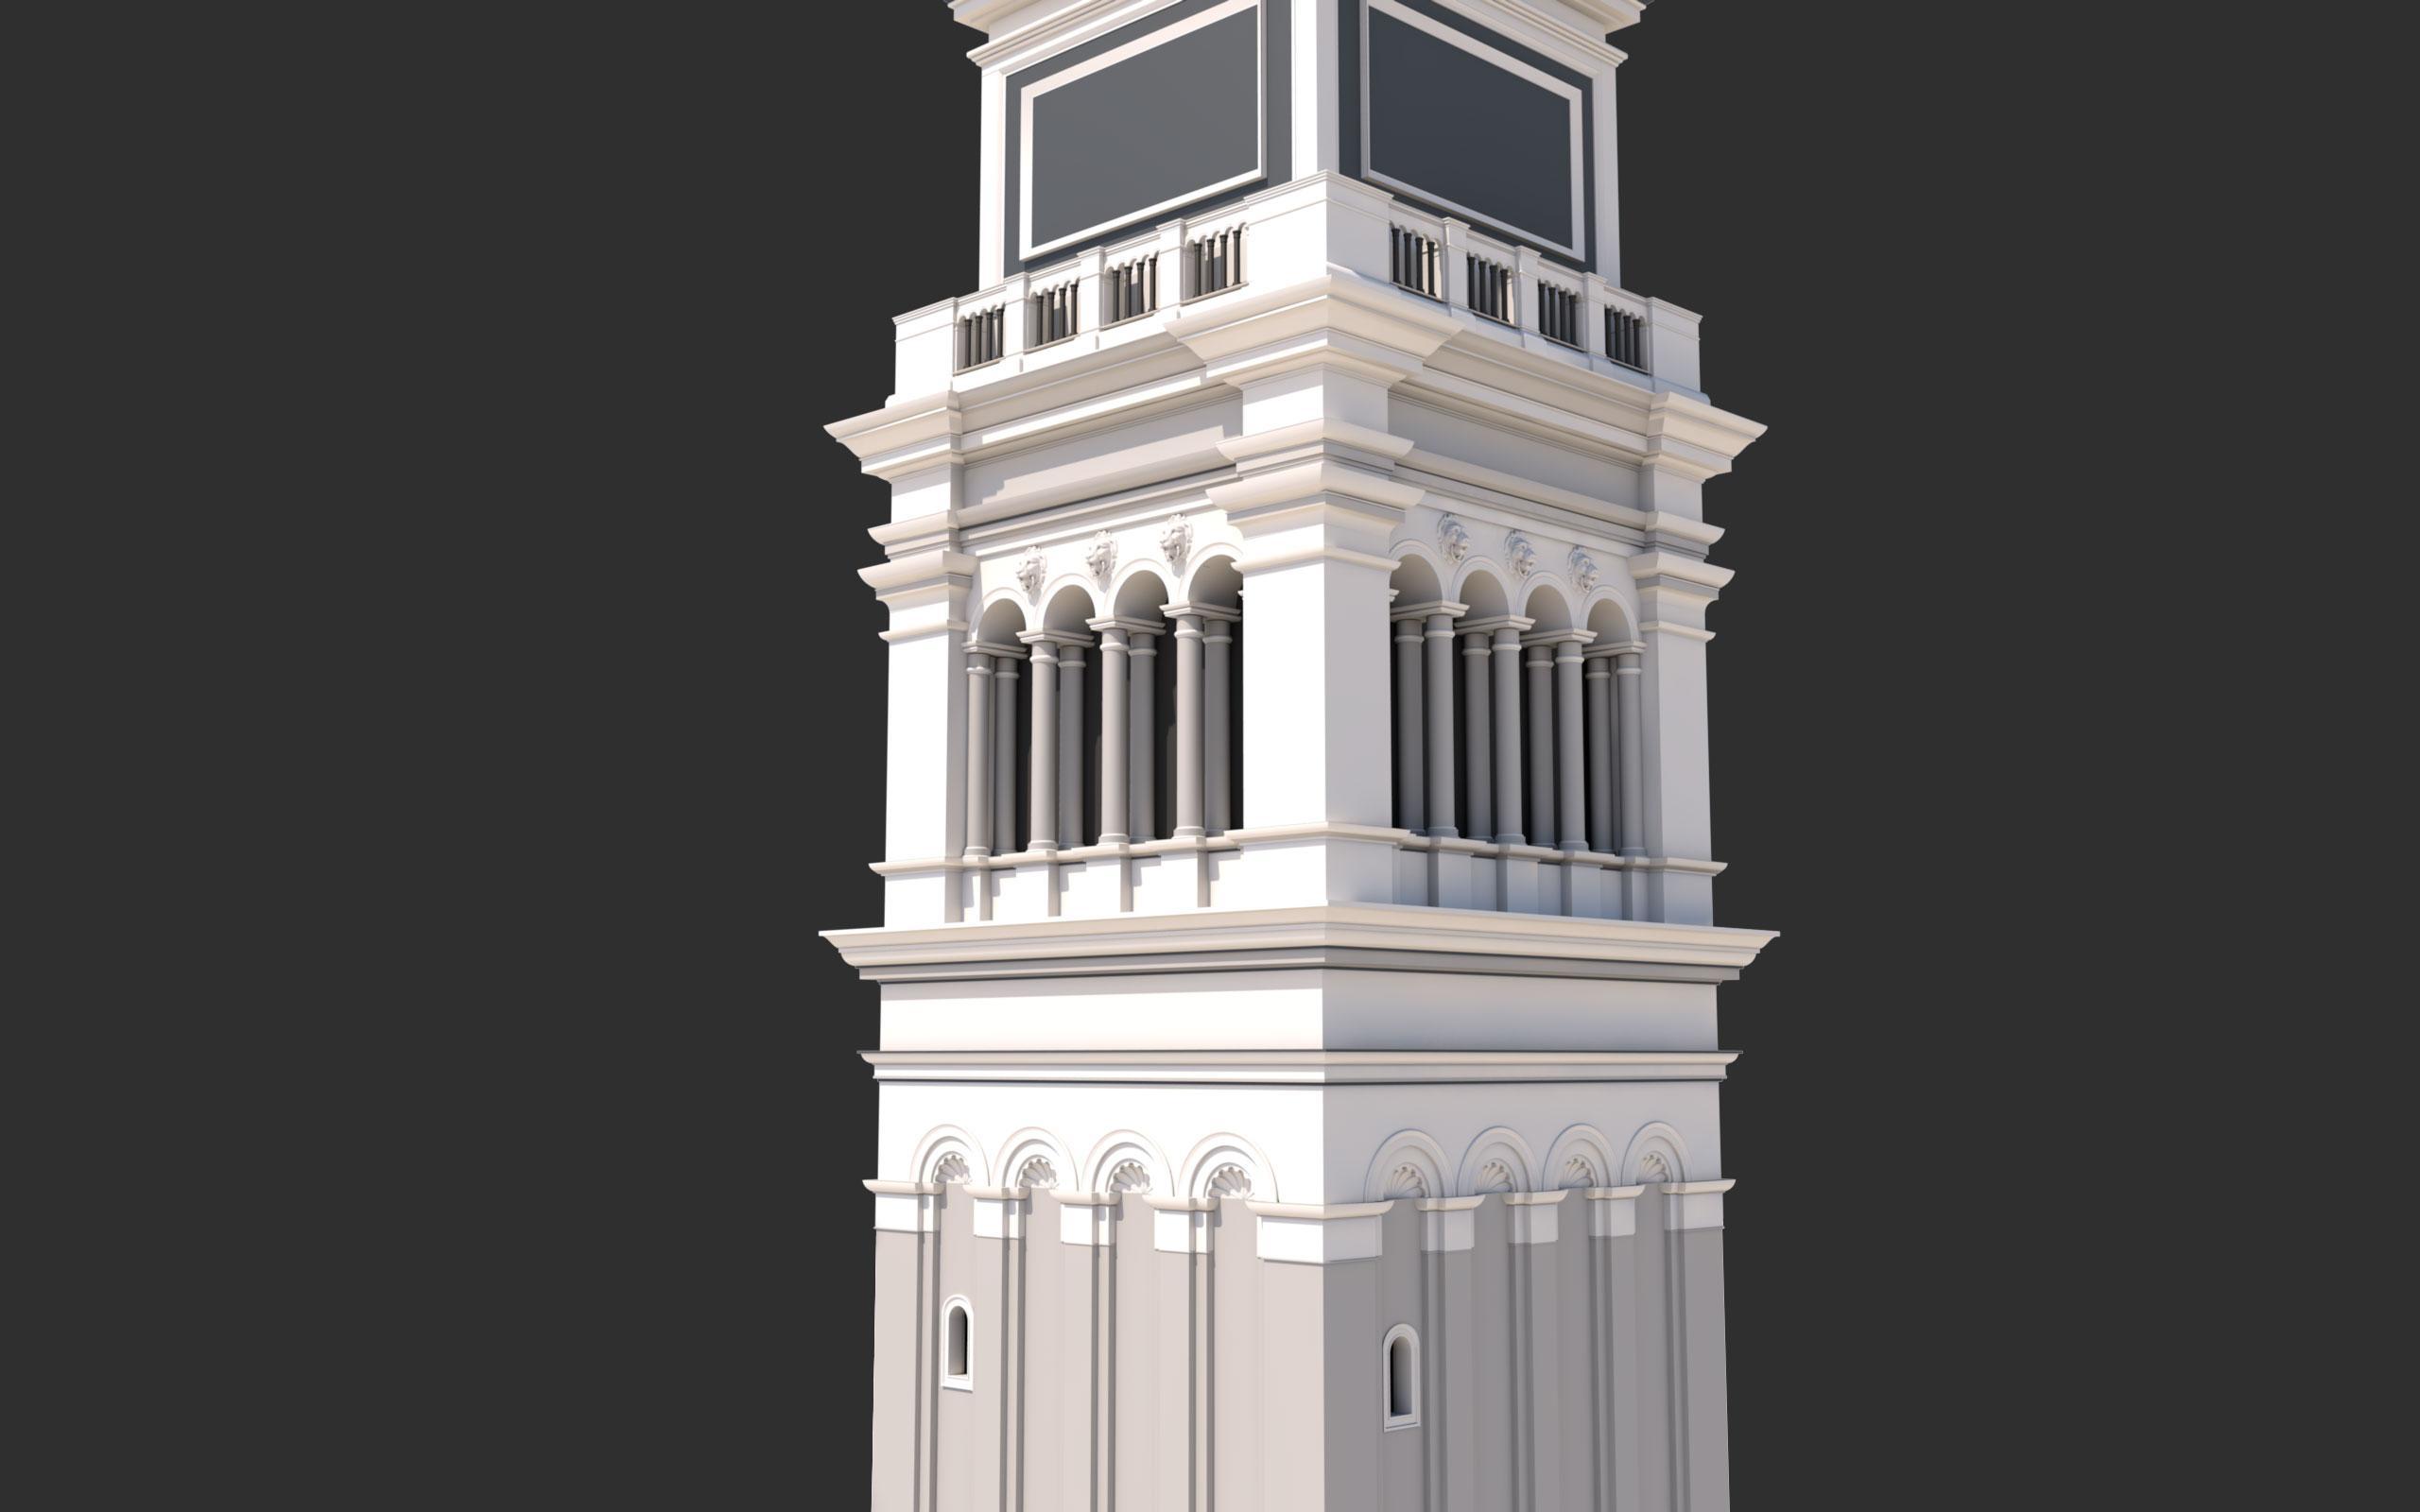
Next, we’ll create the arches that will sit on top of each column. Let’s study the reference image to see all the assets we’ll have to create.
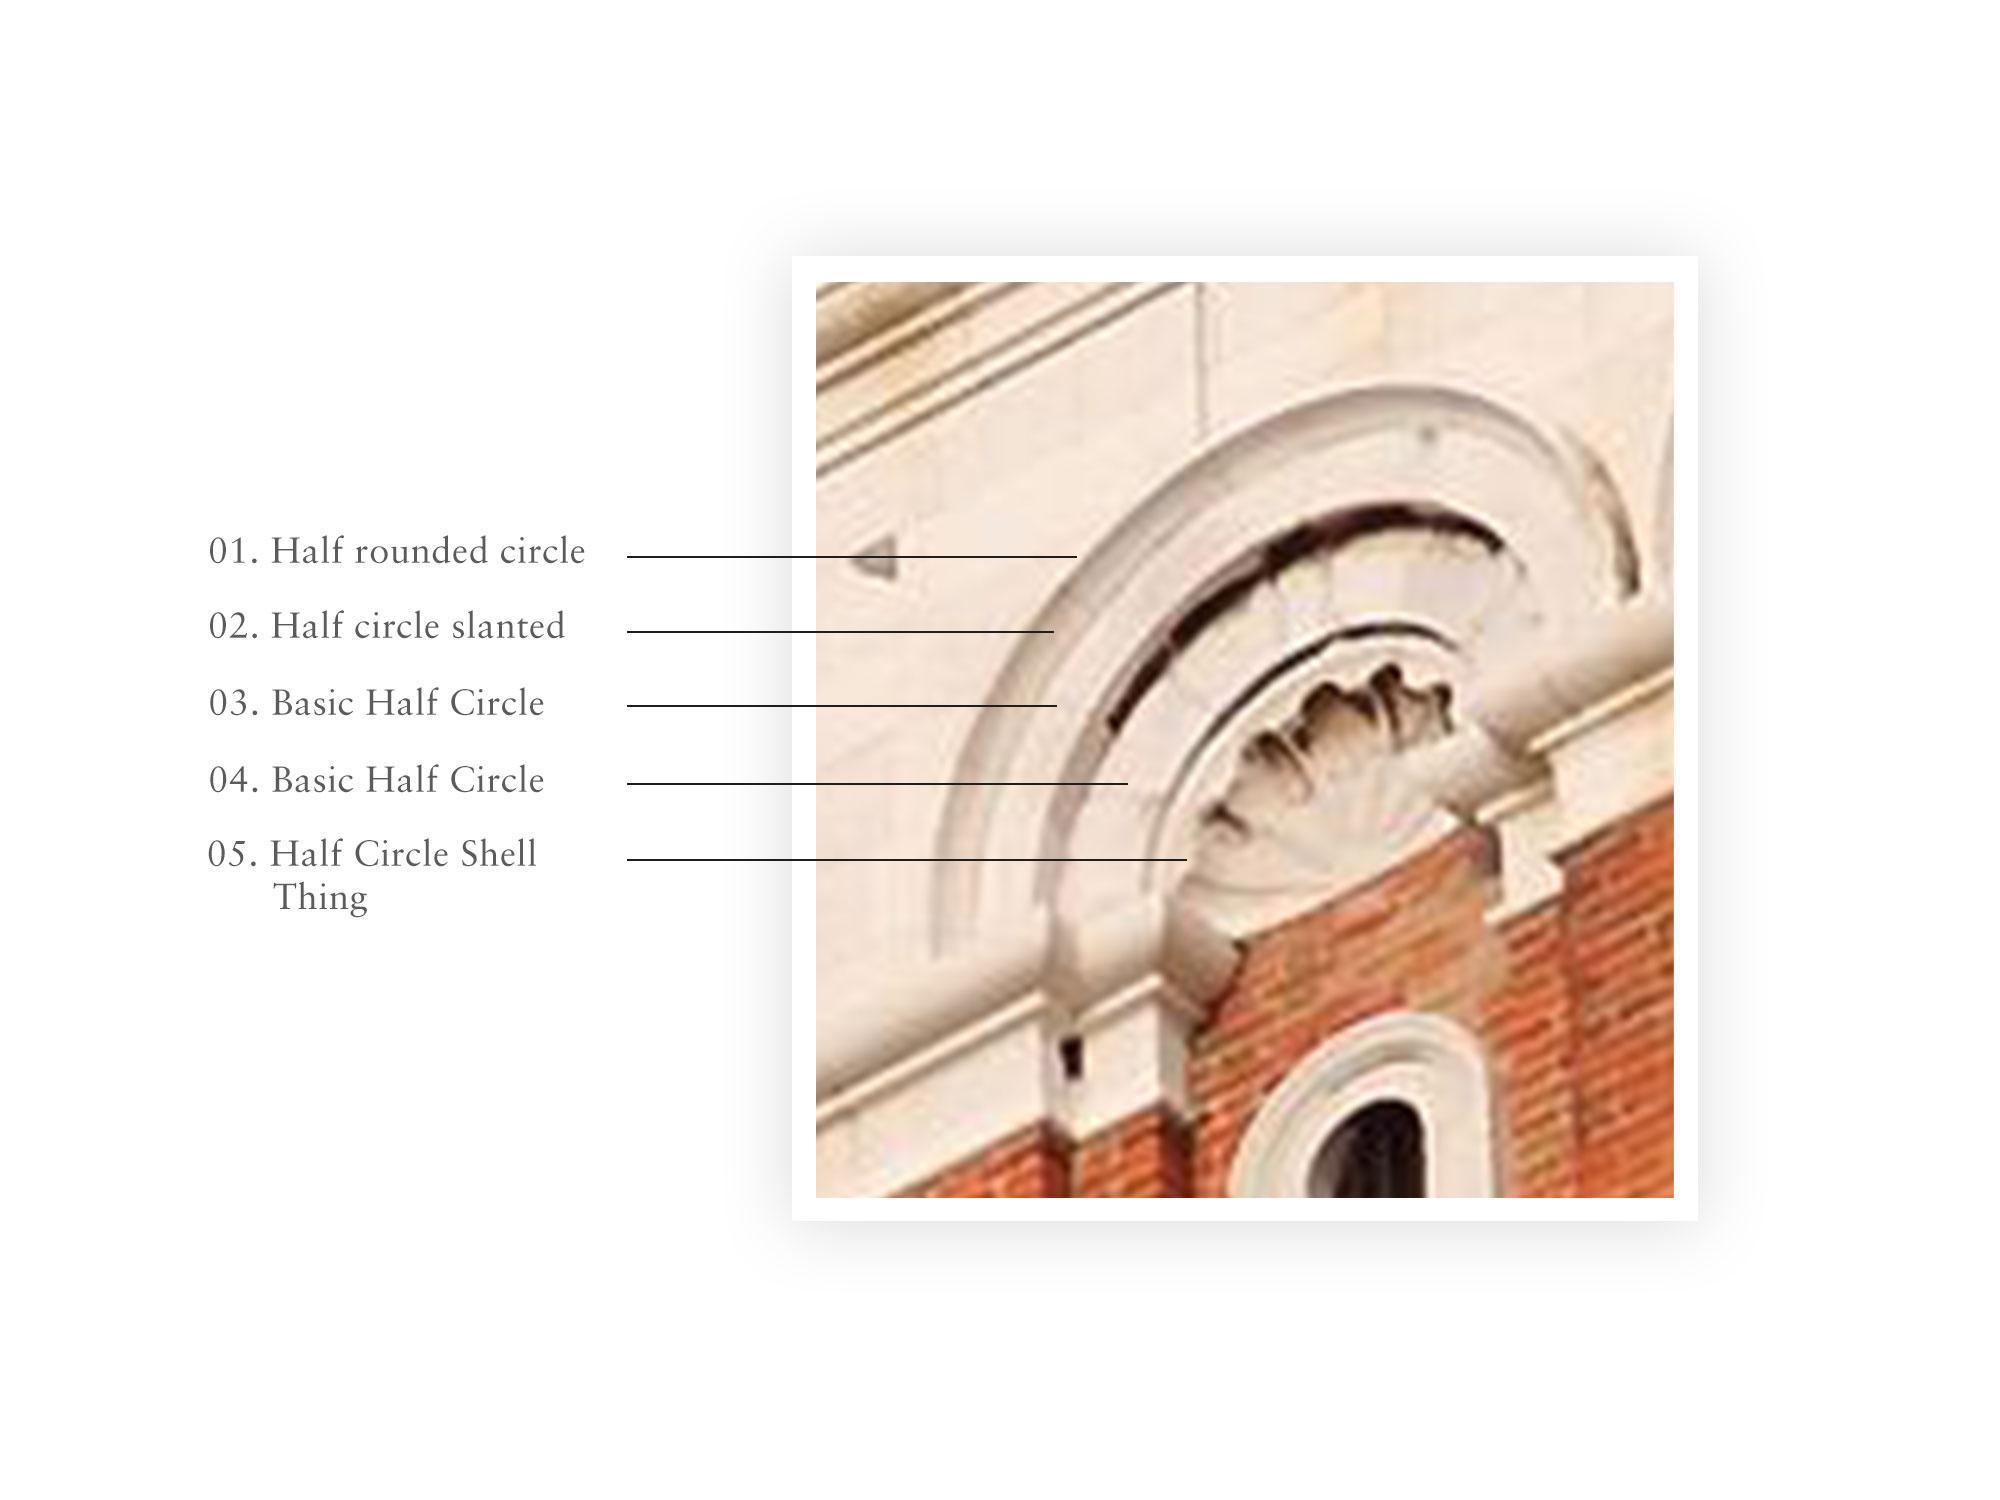
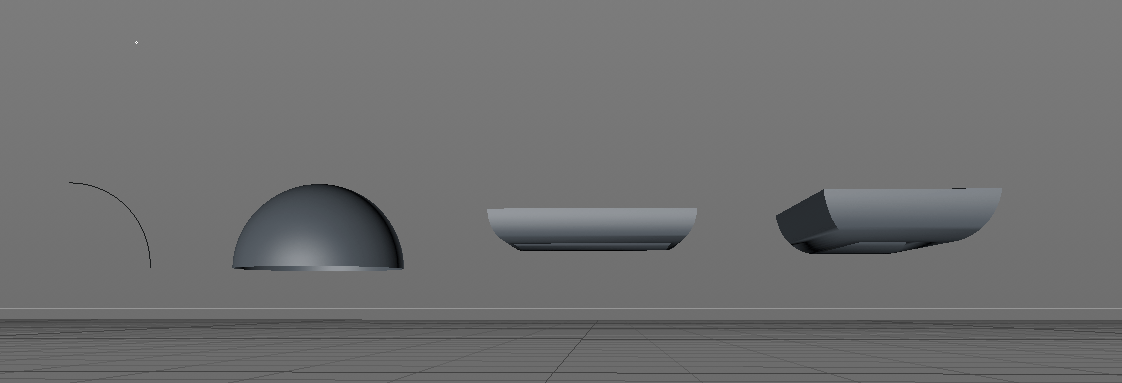
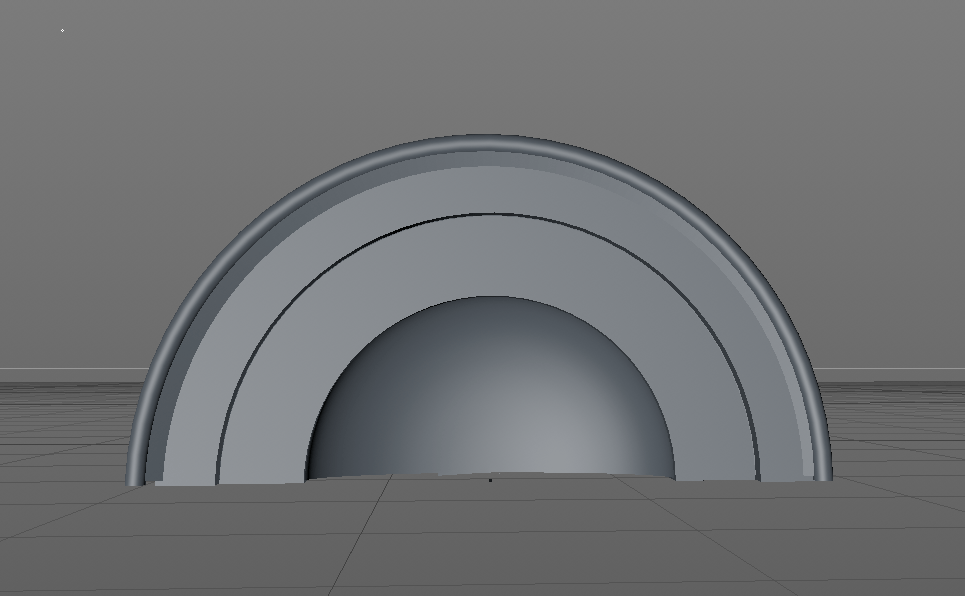
Cool. We counted stuff. Now let’s make them in Cinema. 1–4 should be really easy for you. To make number 2, I used the Arc, set the “Type” to “Sector” and nested it in a Lathe nurb. Remember to take notice of the sizes of the circle related to others (i.e. Number 04 is bigger then number 03). You should get something that’s similar below.
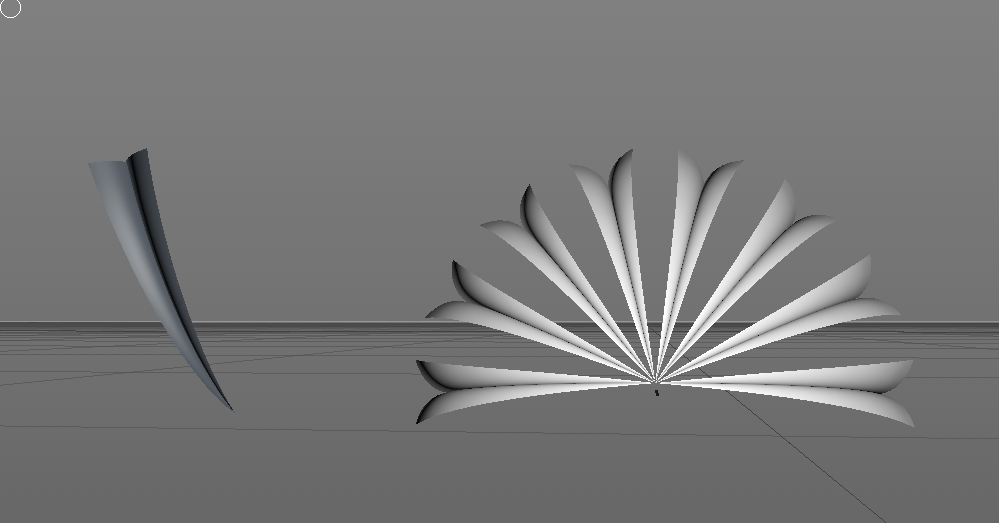
Making the shell shape requires a little more thinking. As you can see, it has 7 “dips.” That means that it has eight sharp dividers that taper off. Let’s start with those — in cinema we can combine multiple shapes from the “pen” section. For this one I will grab the “Arc” and “Cissoid”. I will put them into a sweep nurb and it will create that curved shape. We’ll need to taper one end off by adjusting the “End Scale” property in the nurb from 100% to 0%, real quick. Also, do some adjusting to the “Scale” property under “Details” to make it look right. Next all we have to do it put the shape we just made in a Cloner. In the Cloner, we’ll set the “Mode” to “Radial” and set the “Start Angle” to 0 and “End Angle” to 205. Should look like this:
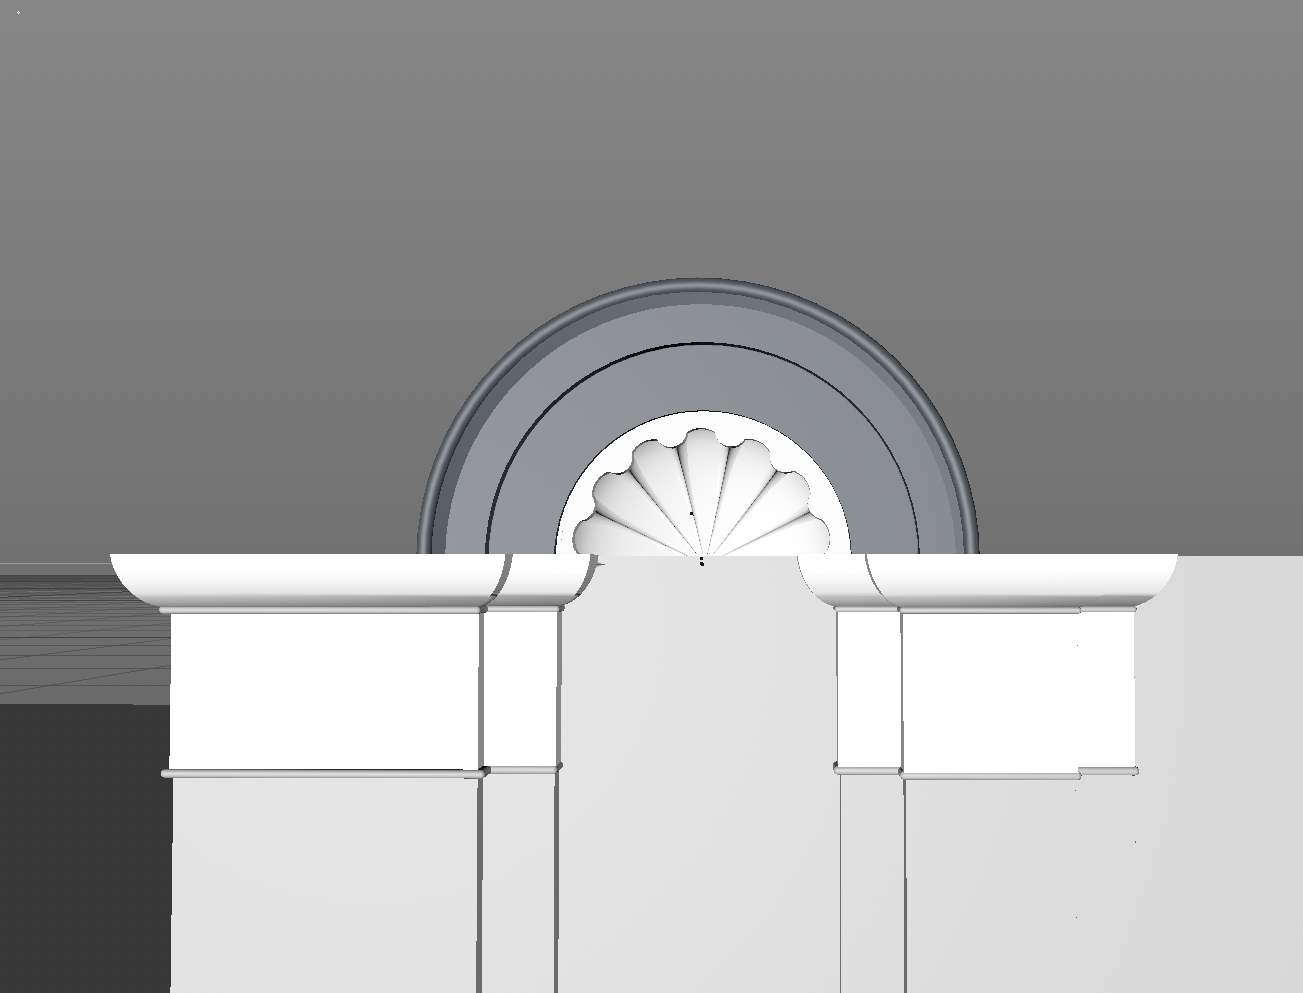
Next we’ll create another arc and wrap it in a lathe nurb. Change the Arc “Type” to “Ring” and then adjust the lath nurb to be a semicircle. Connect the two shapes together like below. Now we have to create the wavy structure that sits on top of the tapered shapes. First I used a cylinder and nested it into a radial Cloner object and then matched the position to the shapes. For the connecting parts that sit in the middle, I used a “Ring Arc,” nested it in an extrude nurb, and then put that in a cloner tool. You’ll need to play around with the Cloner tool until you get something similar to below.

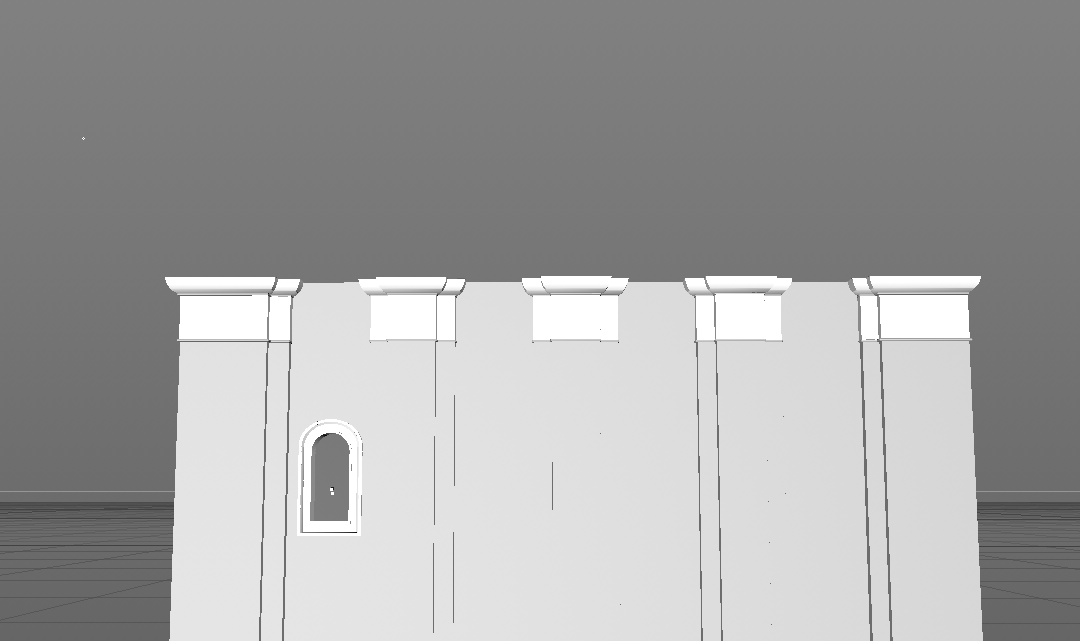
Next we’ll put all these Arch pieces together and should get something like below:
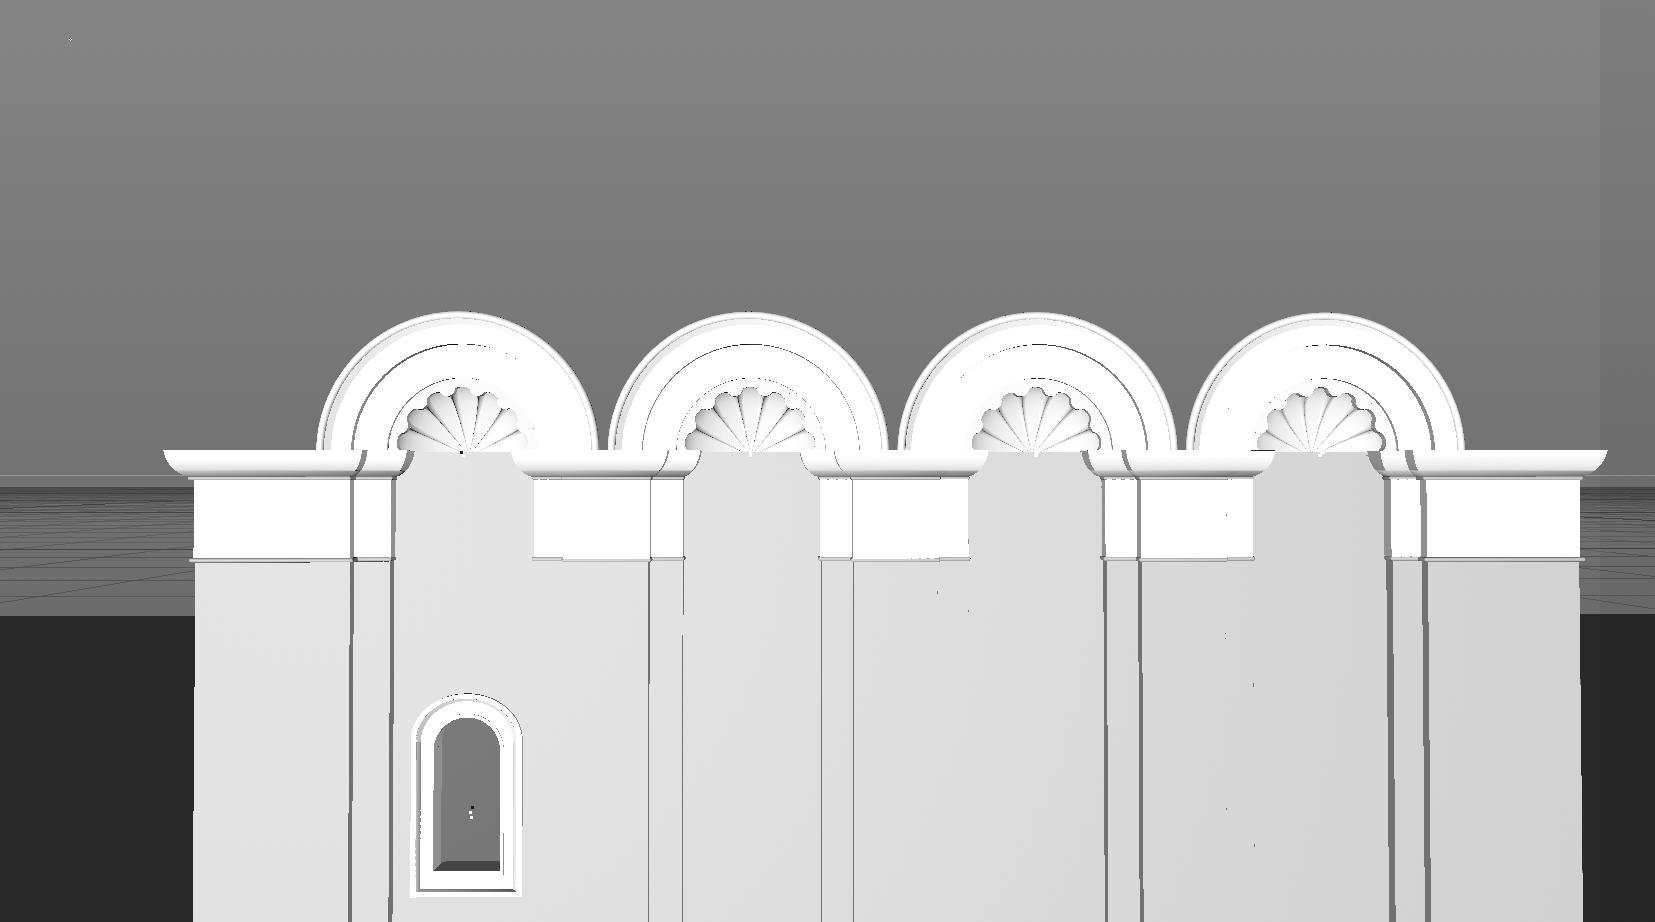
As you clone the arches, it’s a lot easier to get the alignments of the columns on point, based on the position of the arches. After finishing the arches, creating the windows that go down the 1st column should be relatively easy. I’ll let you do that part on your own. Make sure you pay attention to all the details that make up the windows.
Now comes the really cool part where you can make it seem like you really did significantly more work than you actually did. First, group all layers that we’ve created up to this point. You can do this next part with the Cloner tool as well but my personal preference, for this part, is to use the Instance tool three times. This will simply duplicate all the work we’ve done to this point three more times with no additional work. Take your time with with this part — make sure all four sides line up right on all the edges. You should get something like below.
As we continue to move up the tower we need to keep in mind one very important thing — it might look like it, with the extruding decorative shapes, but the base of the tower is the same width the whole way up until the top/roof section.
I’m only saying this because I screwed mine up the first time because I wasn’t paying attention. See, I told you. Pay attention. As we continue to move up the tower, zoom into your image to help you know the number of the shapes. You can see which ones are more curved shapes and which ones are more basic. The basic shapes are great because we know that they’re still a square and from there we can scale them globally until they match our reference image. The curved shapes are going to take some editing because we don’t want to alter them too much vertically, we just want the edit the width. You’ll have to select the polygons from each side and stretch the shape. Pay close attention to spacing and always refer back to your reference image to double check yourself. You should end up with something similar to below.
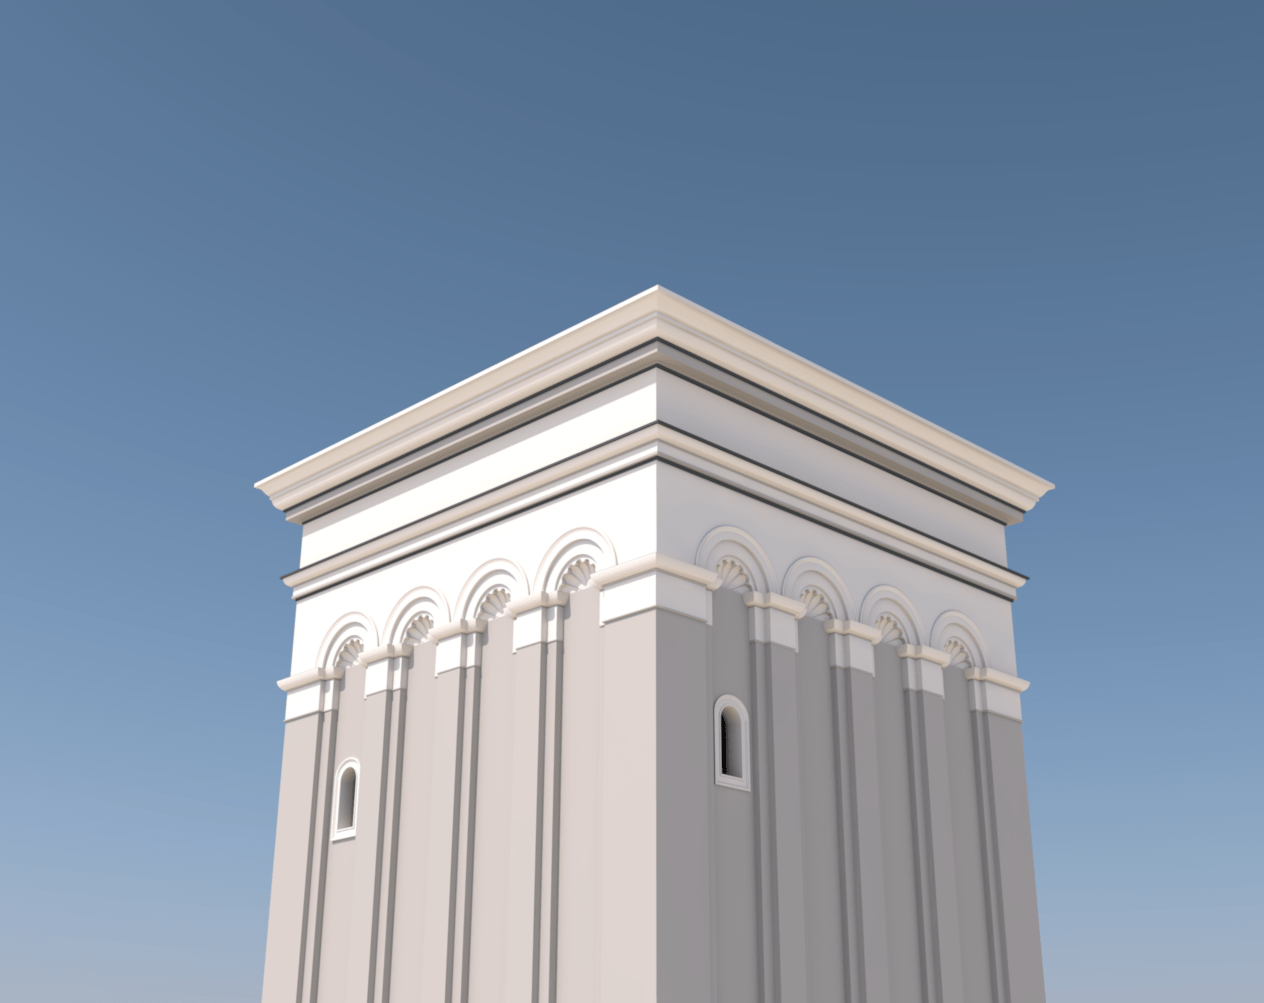
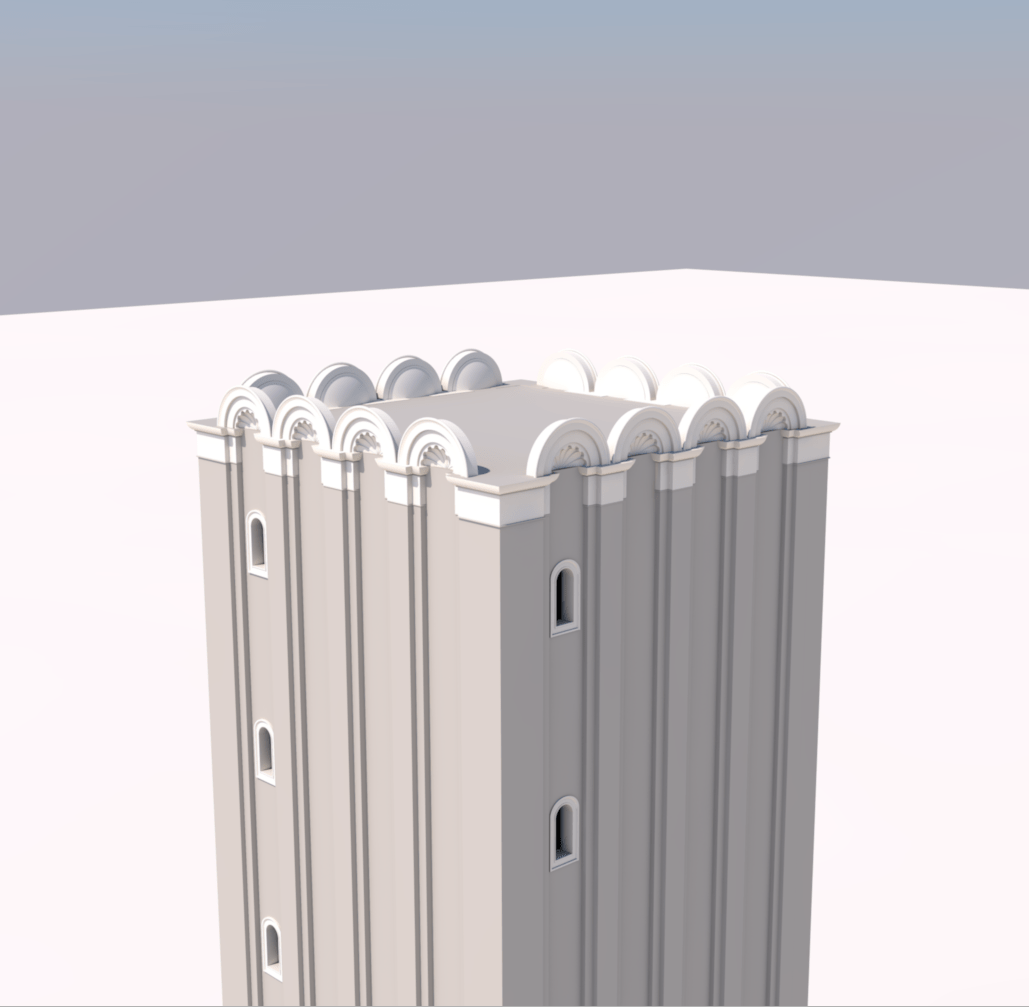
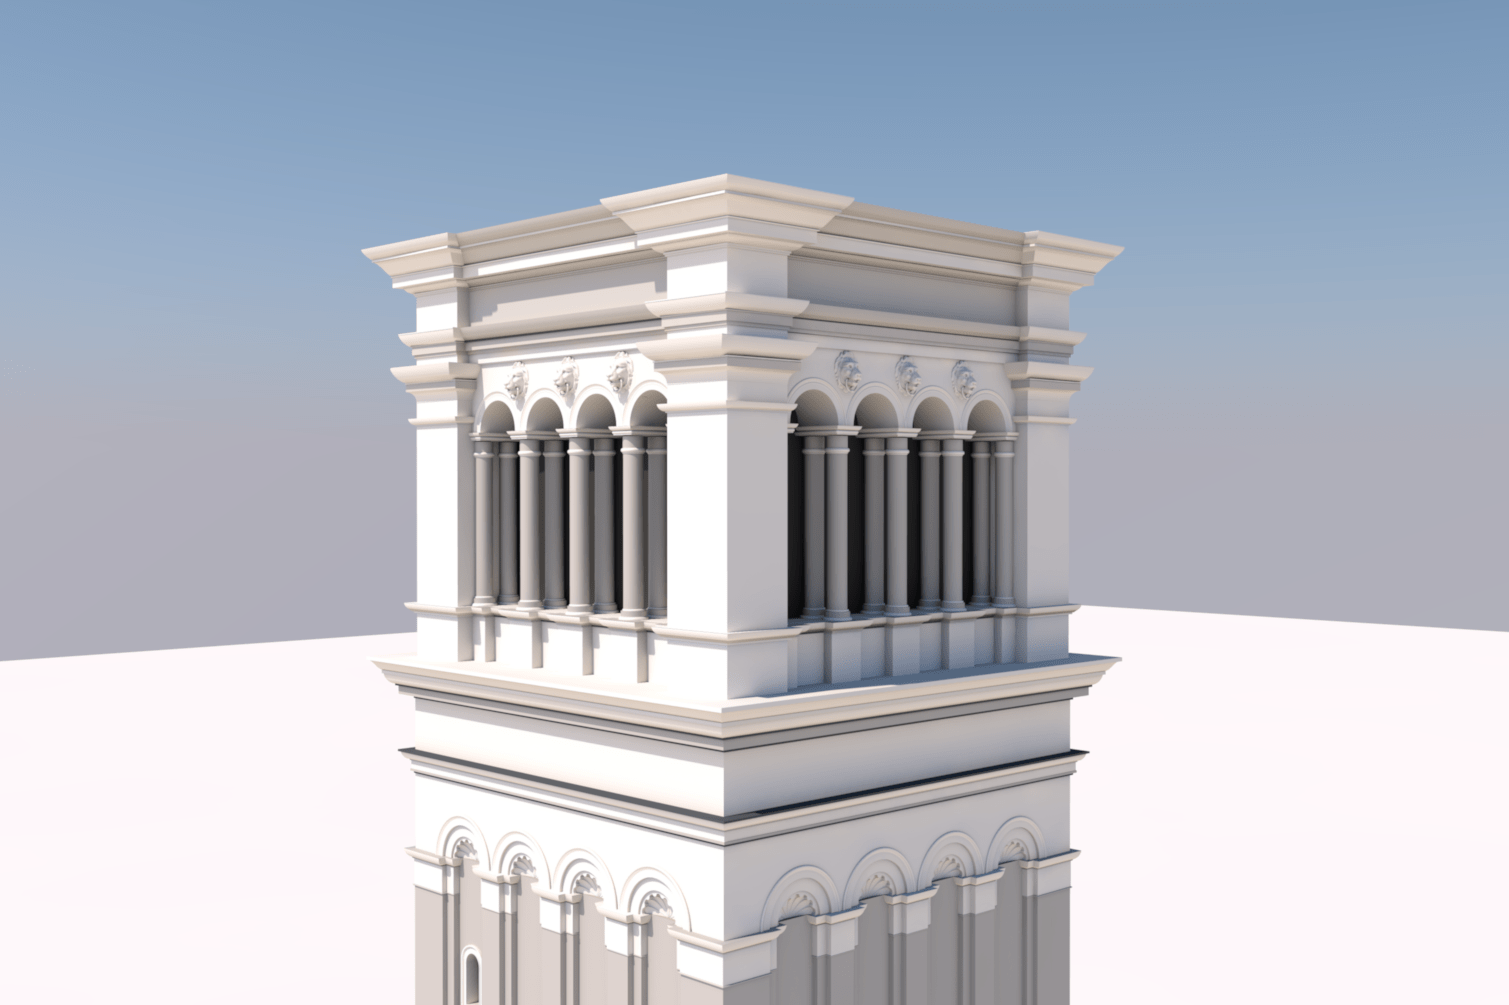
At this point we’ve gone over how to make all the shapes to create the rest of the tower, with a few exceptions. As we move to the observatory part of the tower, we’re referring to reference images to make sure the shapes that we’re using, as well as the spacing between them are correct. It’s a huge help to double check yourself after you think you’ve got it looking right — you’re guaranteed to catch a few minor mistakes here and there. Let’s start with the corners first because it will help us with spacing. We know that the corners line up with the base of the tower as I showed before. You can use the cloner tool once you build out a side and then line up each corner to the base of tower like below.
As you can see, the base of the observatory room is a bit inset. To know this, we have to refer to a different reference image.

Here we can draw several conclusions:
- The base is inset.
- The wall with the columns and lion heads are slightly less inset.
- All “decorative” pieces are continuous, meaning they’re all the same shape, just some are inset more then others.
- Free stuff is cool – http://www.turbosquid.com/3d-models/leon-head-max-free/879382
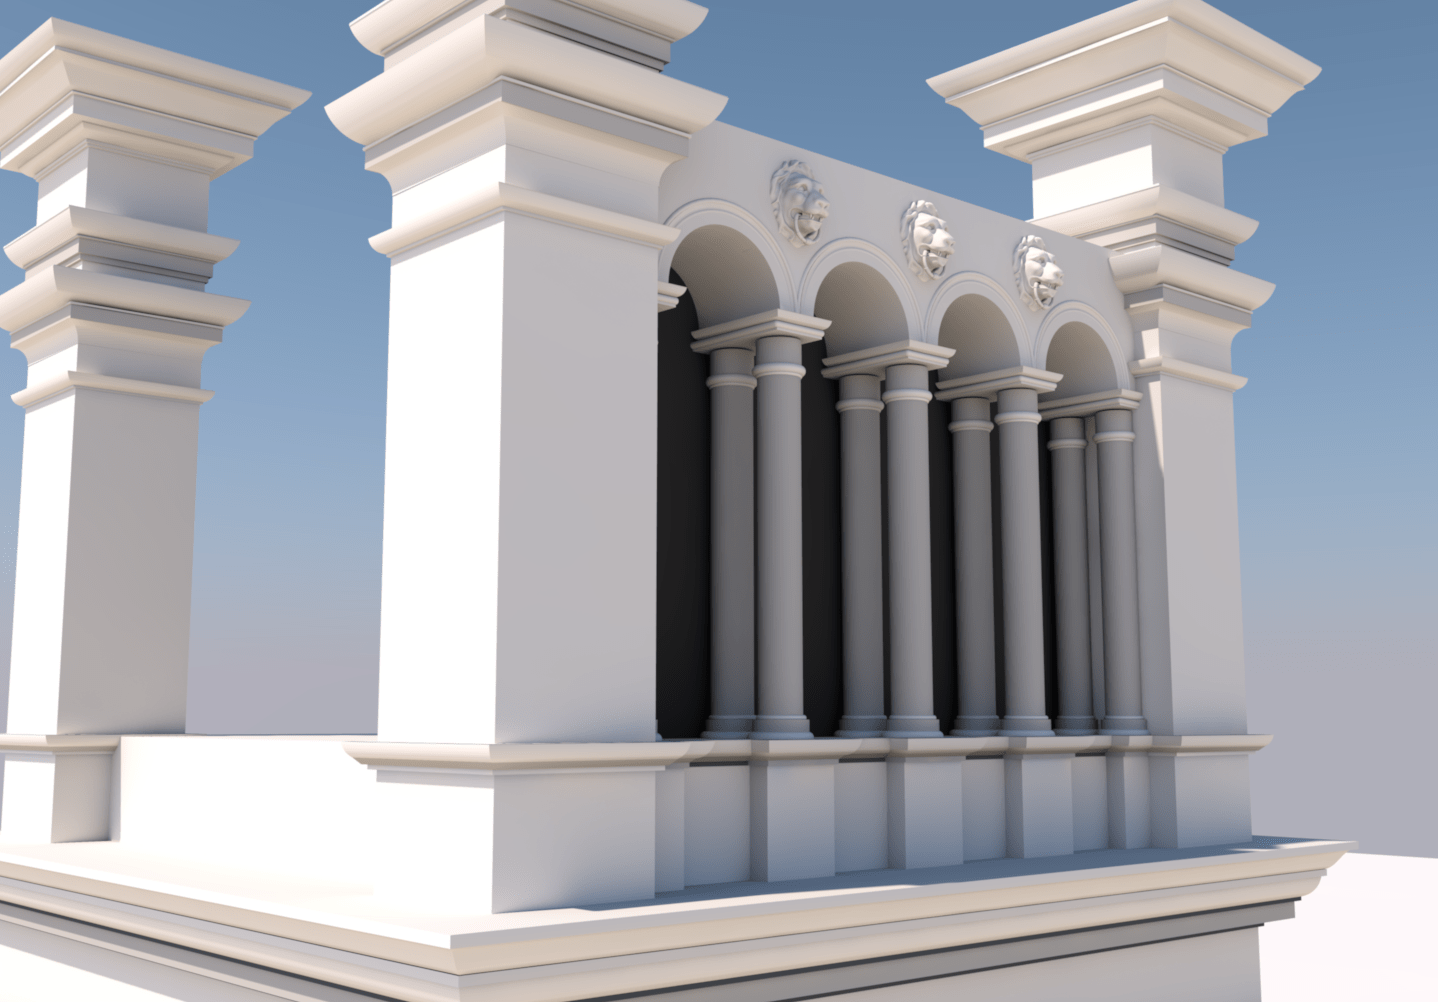
So as we create this wall, we’ve already done a lot of work when we created the corners. Just copy, paste, and slightly morph each shape — you only have to adjust the X axis to line up to each of the columns. To create the columns, we only have to create one of them and use the cloner tool. Mine came out to look like this. An important note is that we need to separately use the cloner on the arches up top and the columns below.
We know that there are five columns and that the two end ones are only halfway exposed. This will help us a lot when figuring out the spacing of the cloner tools. After that we can duplicate the decorative shapes on the bottom to give us that bottom base that connects the columns and corners. You should end up with something similar to below after you utilize the Cloner tool.
The next step is to create three more Instances of the wall we just created and place them in-between the remaining corner pieces. After that we need to expand the remaining decorative shapes so it’s continuous on all four sides of the tower. After copying and pasting the work we’ve already done, we just need to work each shape to be something similar to below.
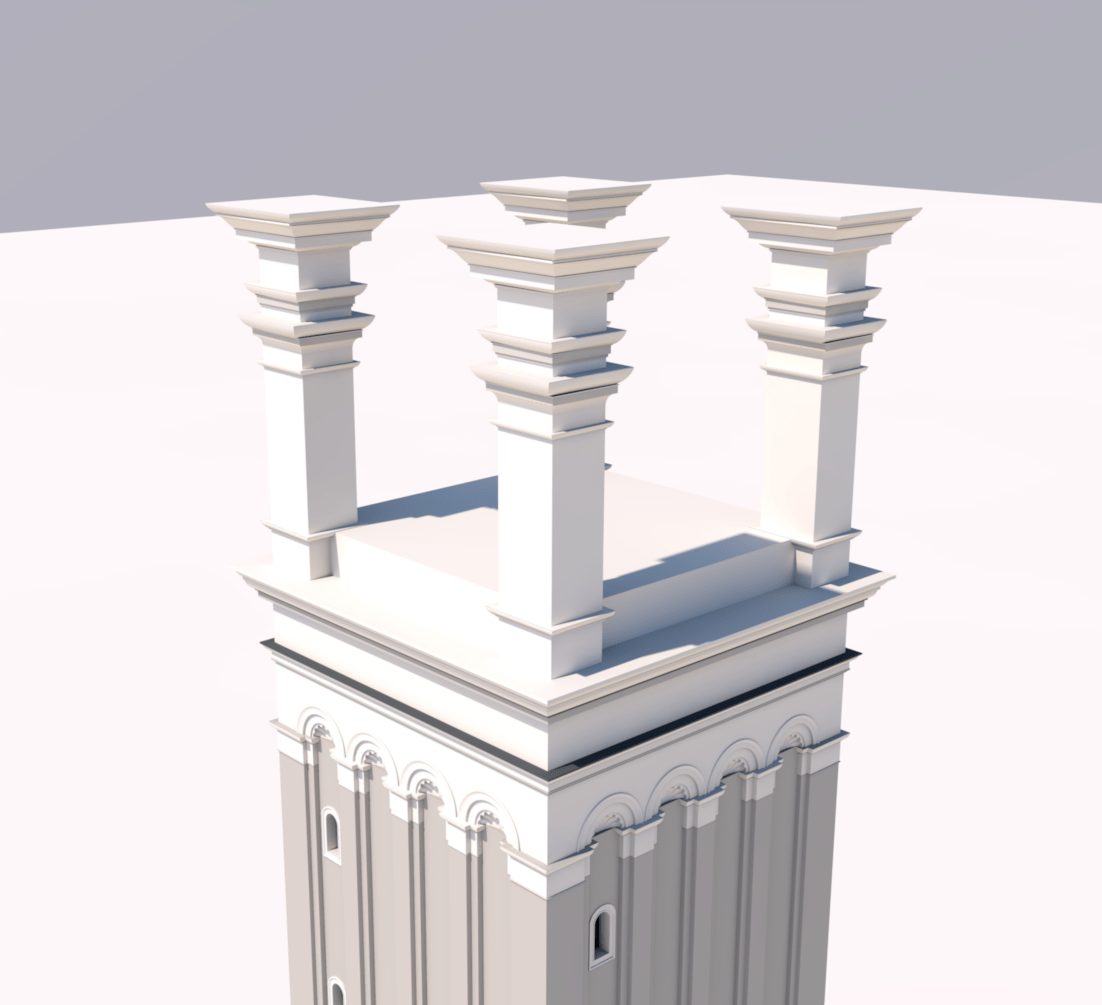
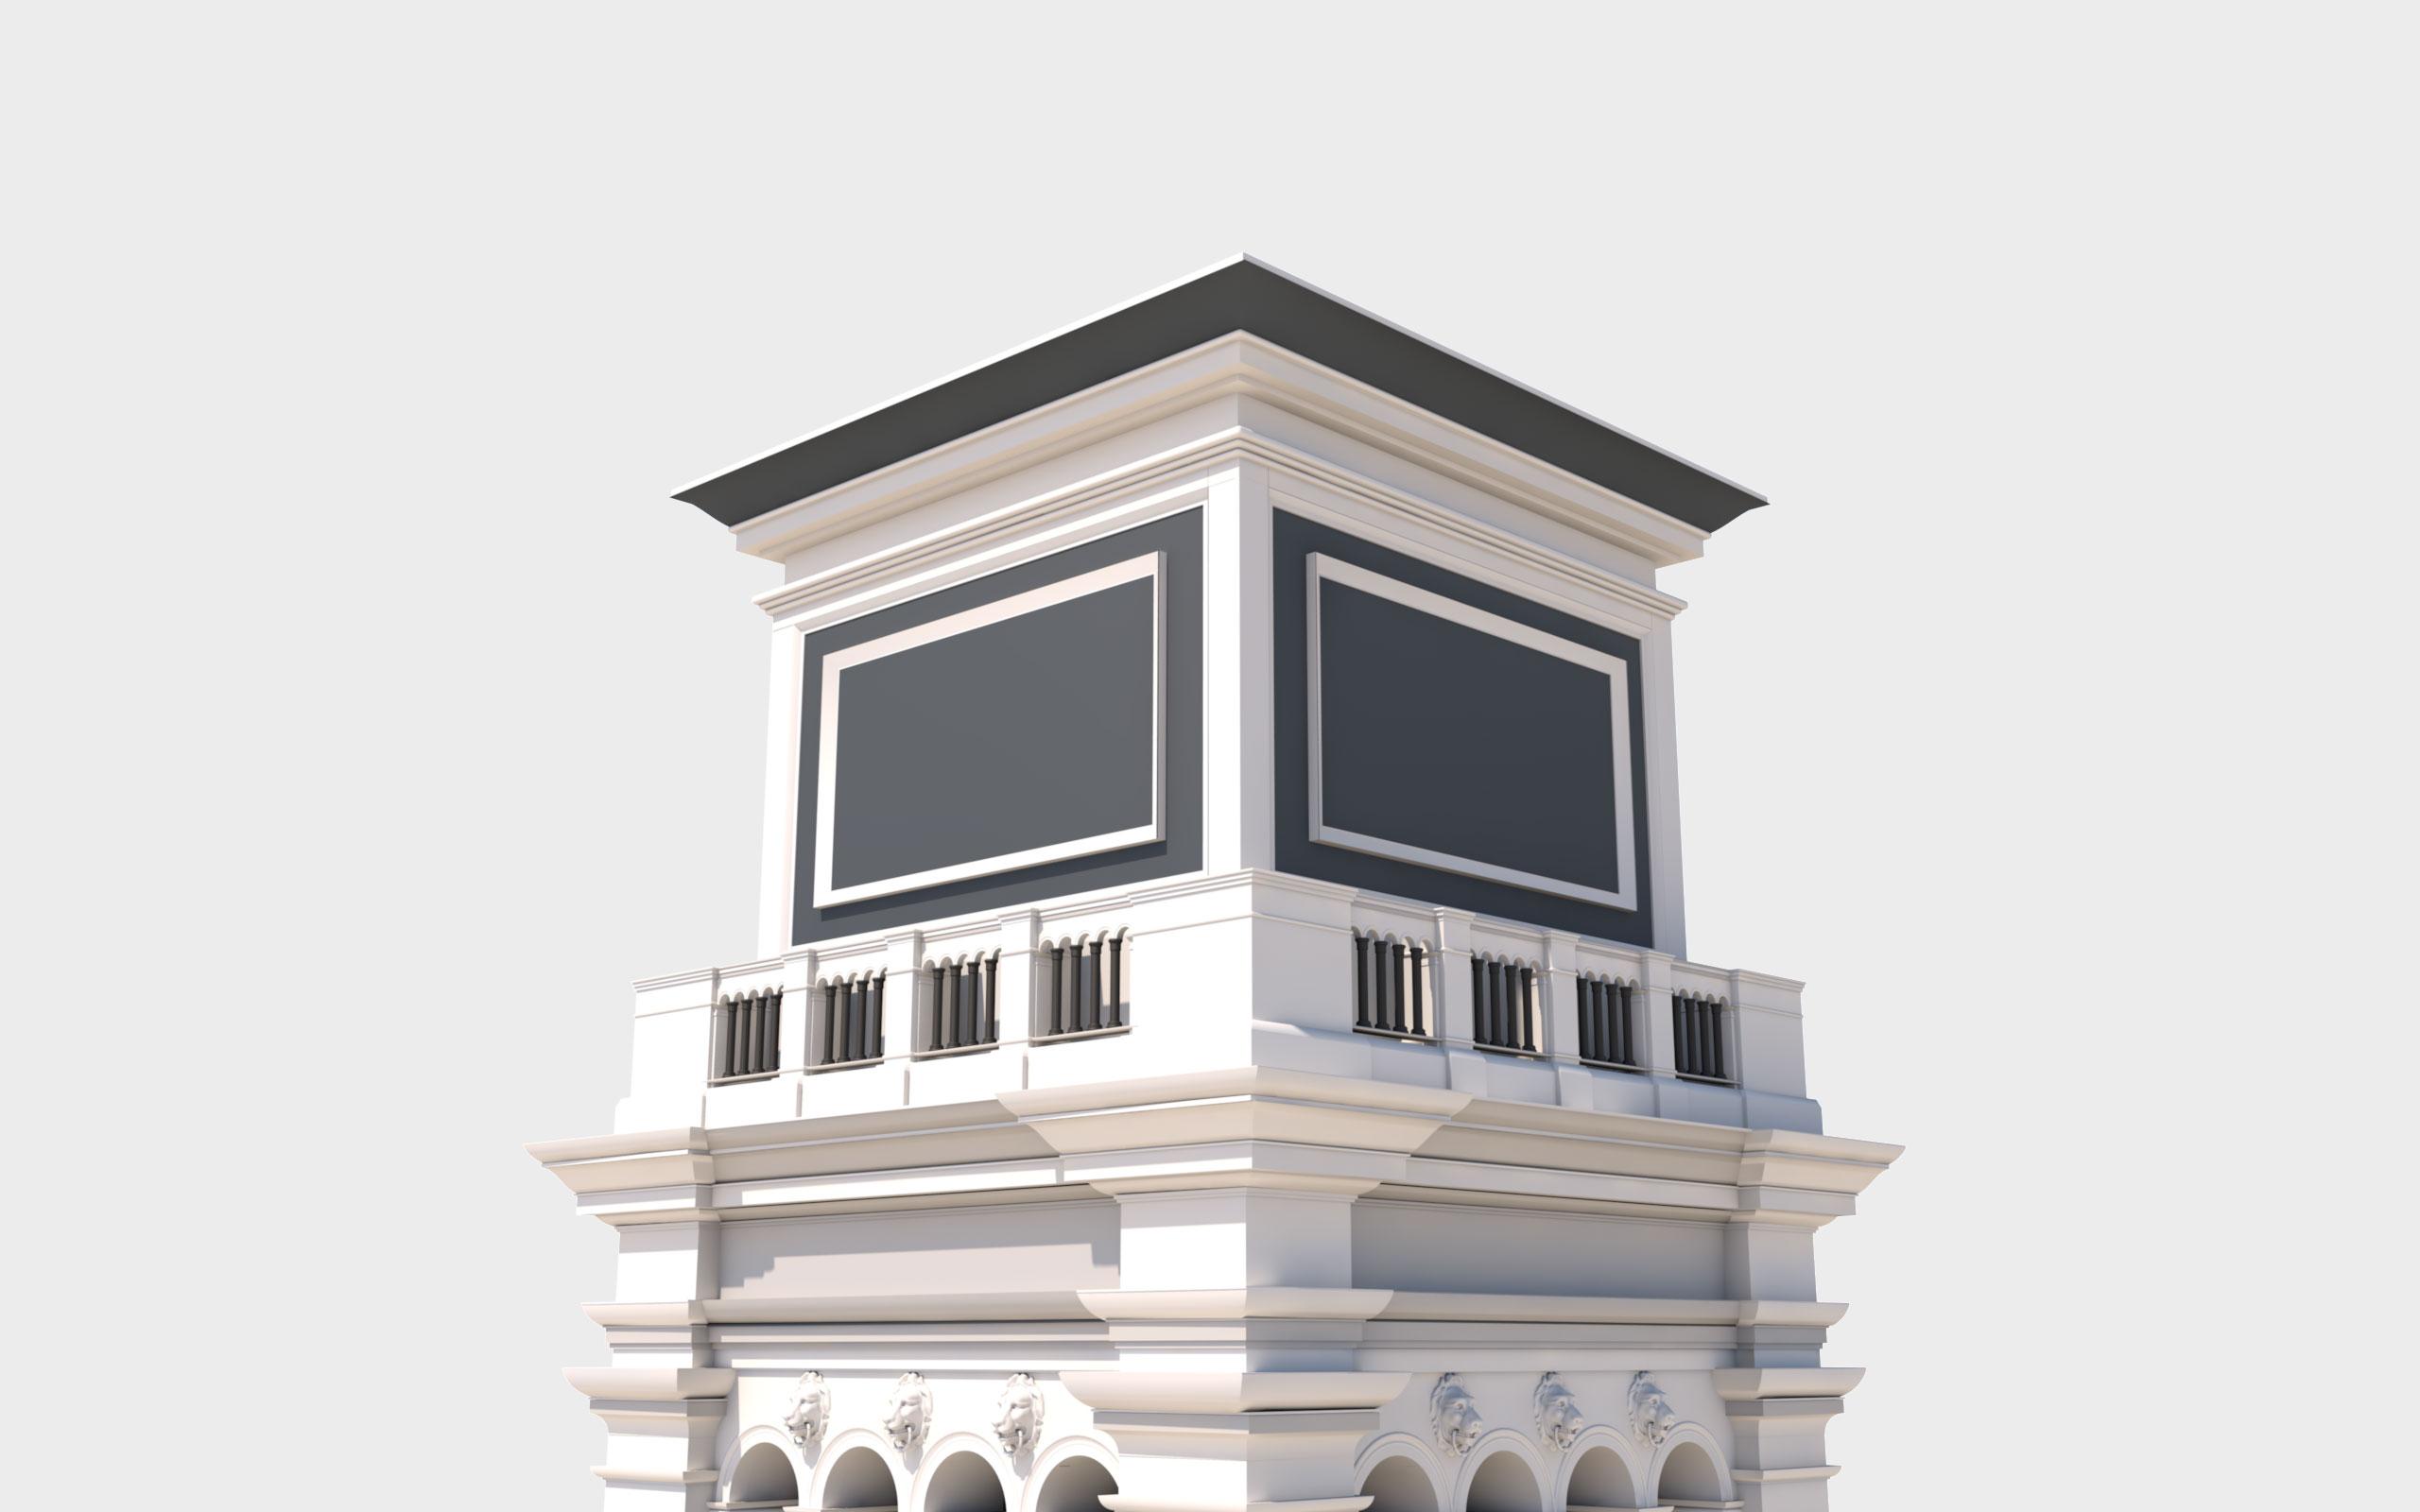
For the next part of the tower — we’ll work through it the same way that we just did the the observatory room by starting with the corner pieces and then filling the in-between spaces in.
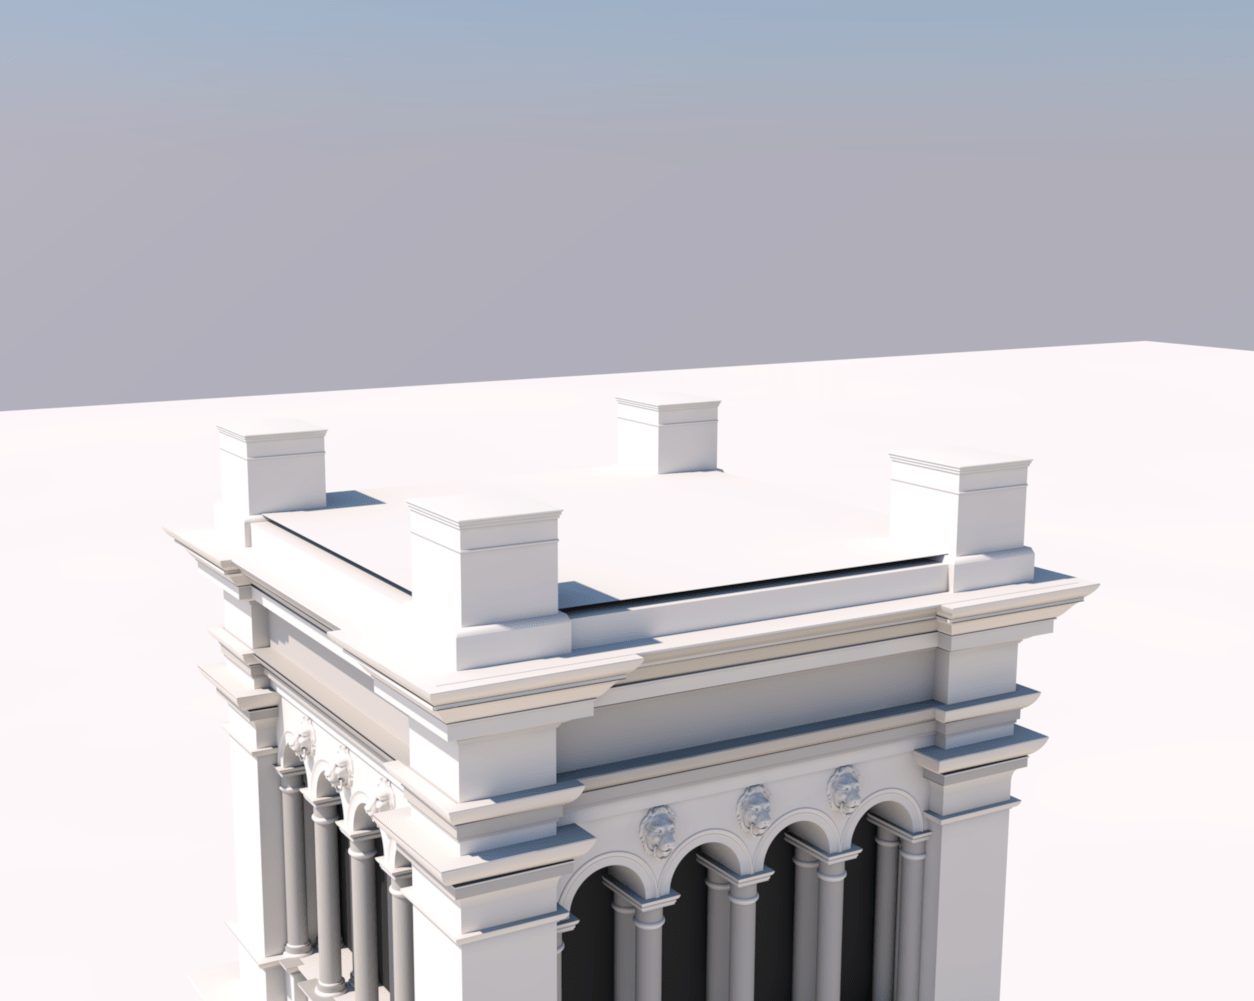
The corner pieces on this part are a little different. As you can see from the reference image, the block is sitting on a wider block that’s connected with a slant shape.
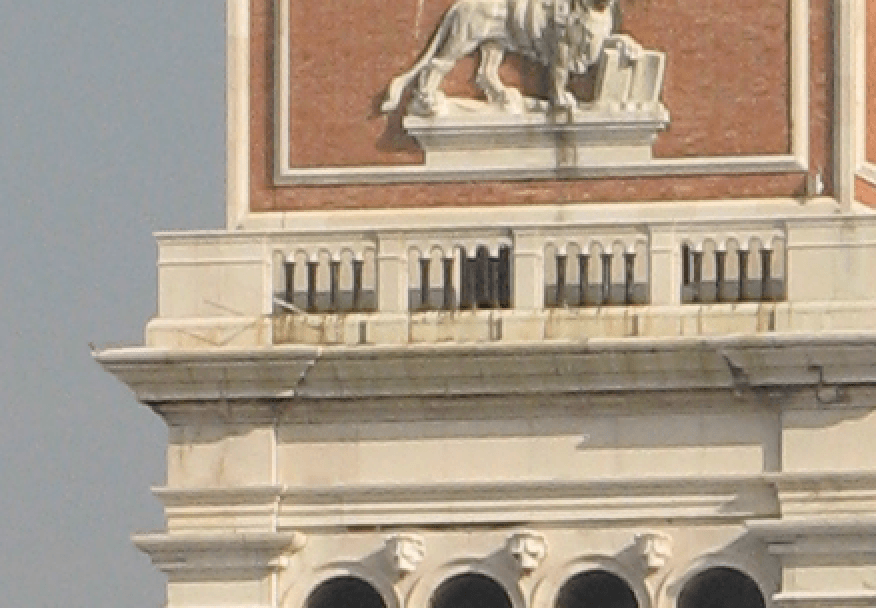
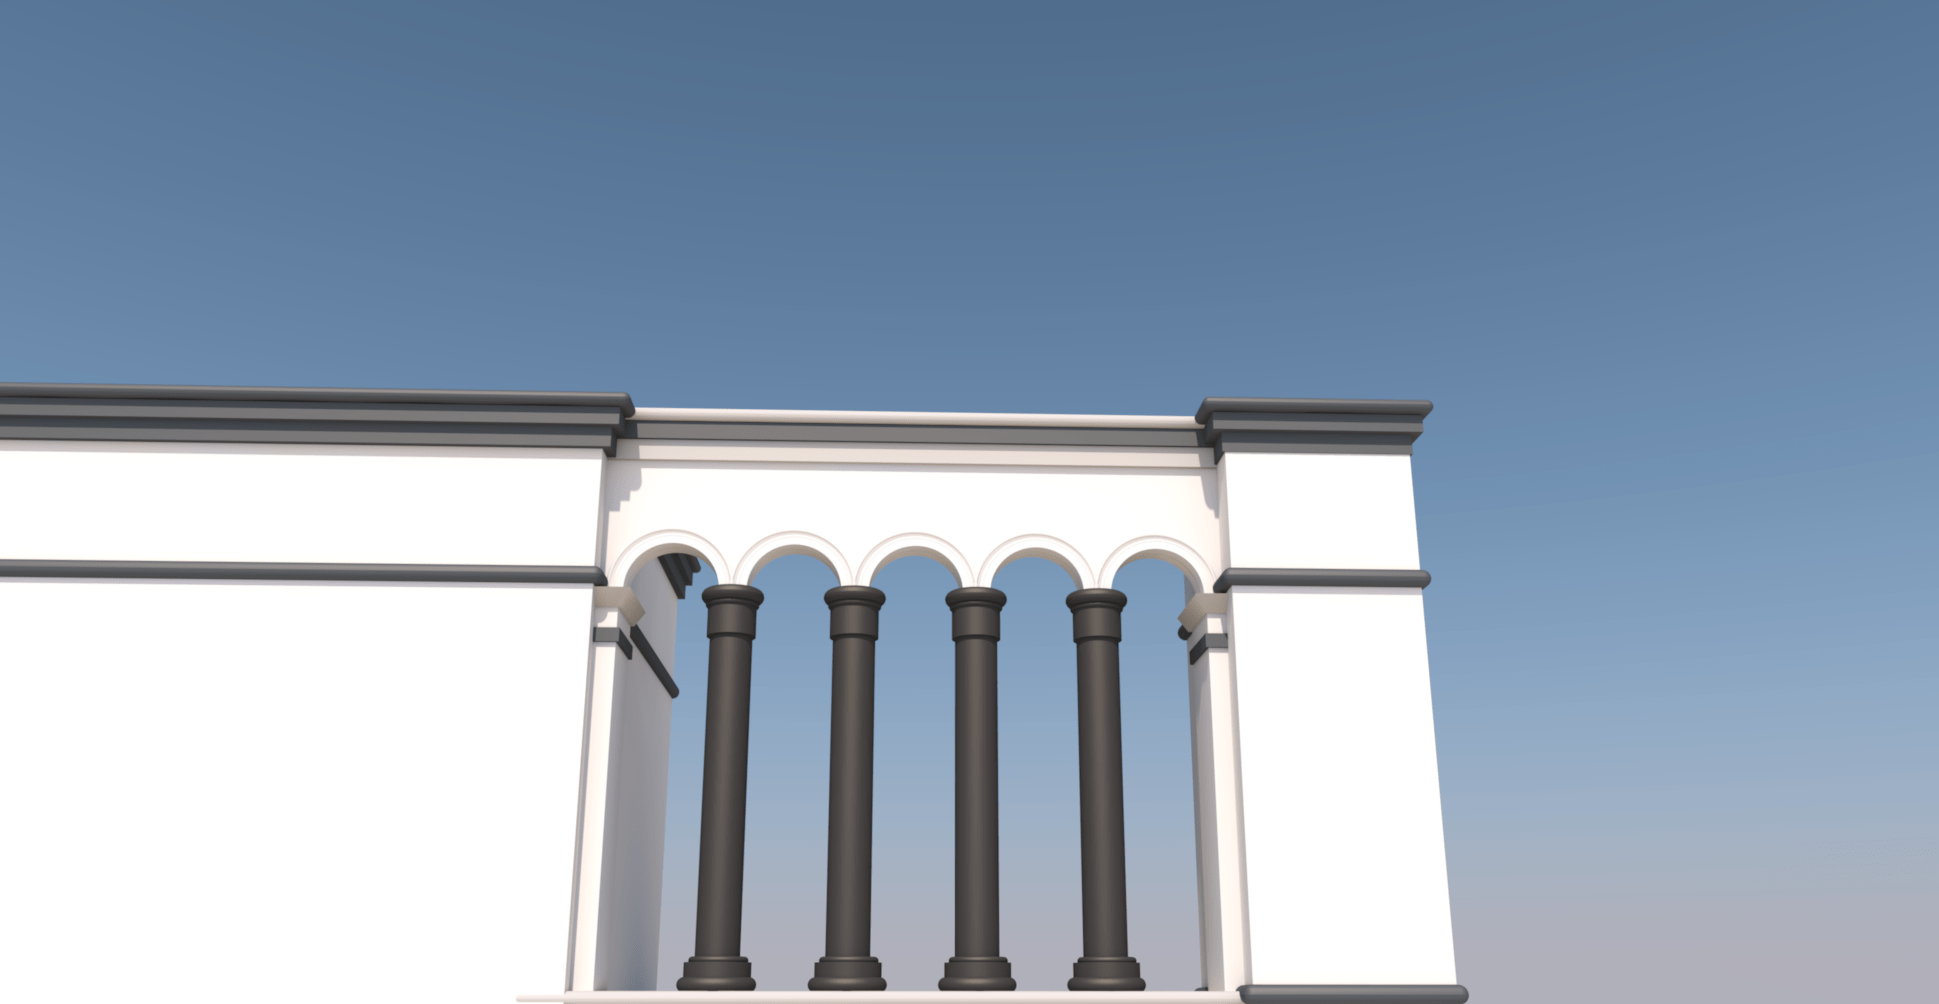
As you can see, just like the rest of the tower, the decorative shapes are continuous around all four sides of the tower. The fences are inset a bit but still maintain the same shapes as the corner pieces. The divider pieces are the exact same as the corners except a lot skinnier. As we can see with the fences, there are skinny rectangle shapes on the ends and four columns with arches. Here’s what my fences turned out to look like:
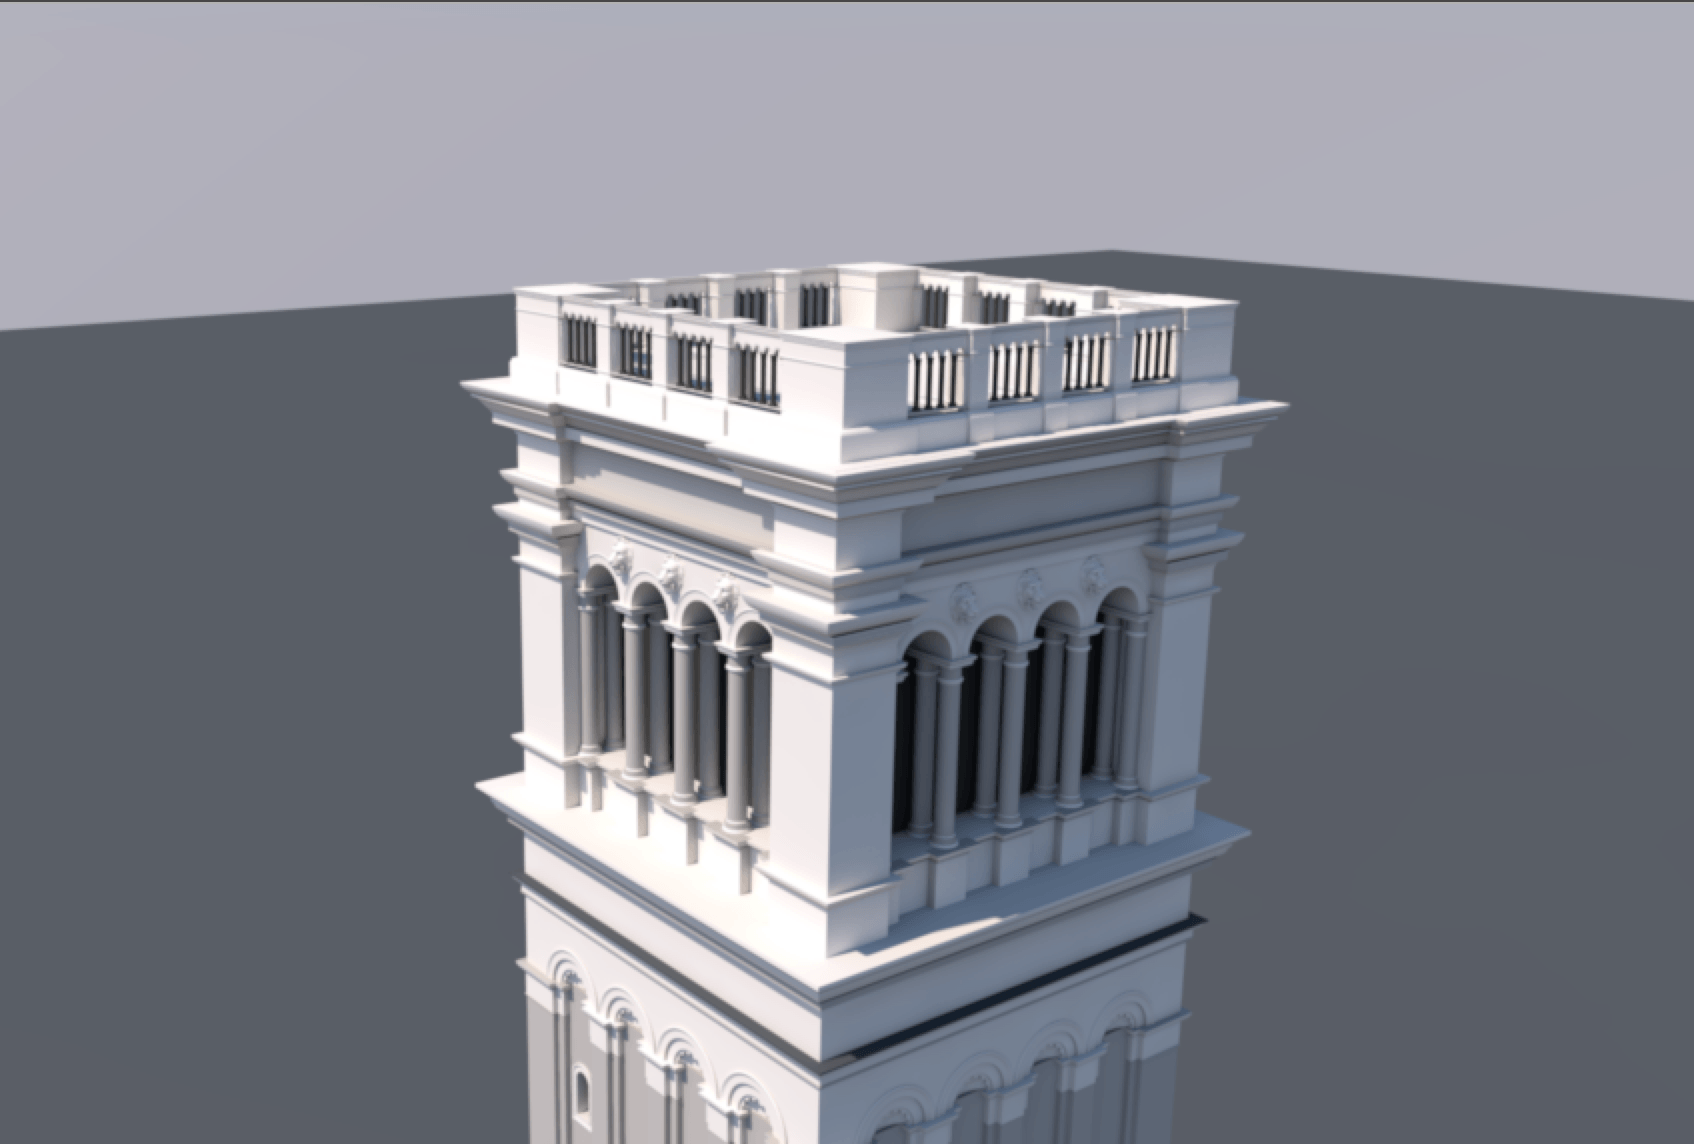
Next, keep working up the tower. We all know how to make these shapes at this point — now it’s just the tedious process of spacing and placement. Mine came out to look like this:
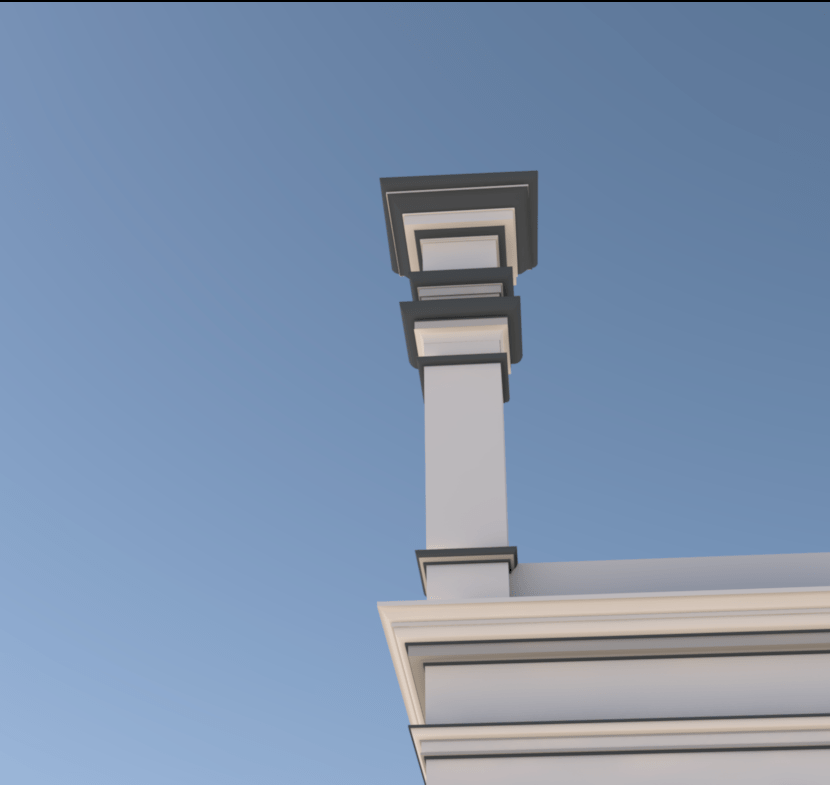
Okay guys, the next part is tough. Probably because my math skills are not great Luckily, for you, I’m really good at math. So when it comes to acute angles + cloner tool positioning, there’s no telling what genius stuff I’m going to come up with next. Our main goal with creating anything in Cinema, is being efficient. Meaning the goal is to only make something once and then repeat it. When dealing with acute angles, keep in mind that one end has to be bigger then other. As we refer back to our reference images, we first need a base Pyramid as a guide for the size of the corner pieces. My Pyramid size came out to X = 911cm, Y = 1676cm, Z = 911cm. From here it will be easier to figure out the size of our corners. Keep in mind that the tips don’t completely have to meet as there are shapes that will need to be added for the statue to stand on.
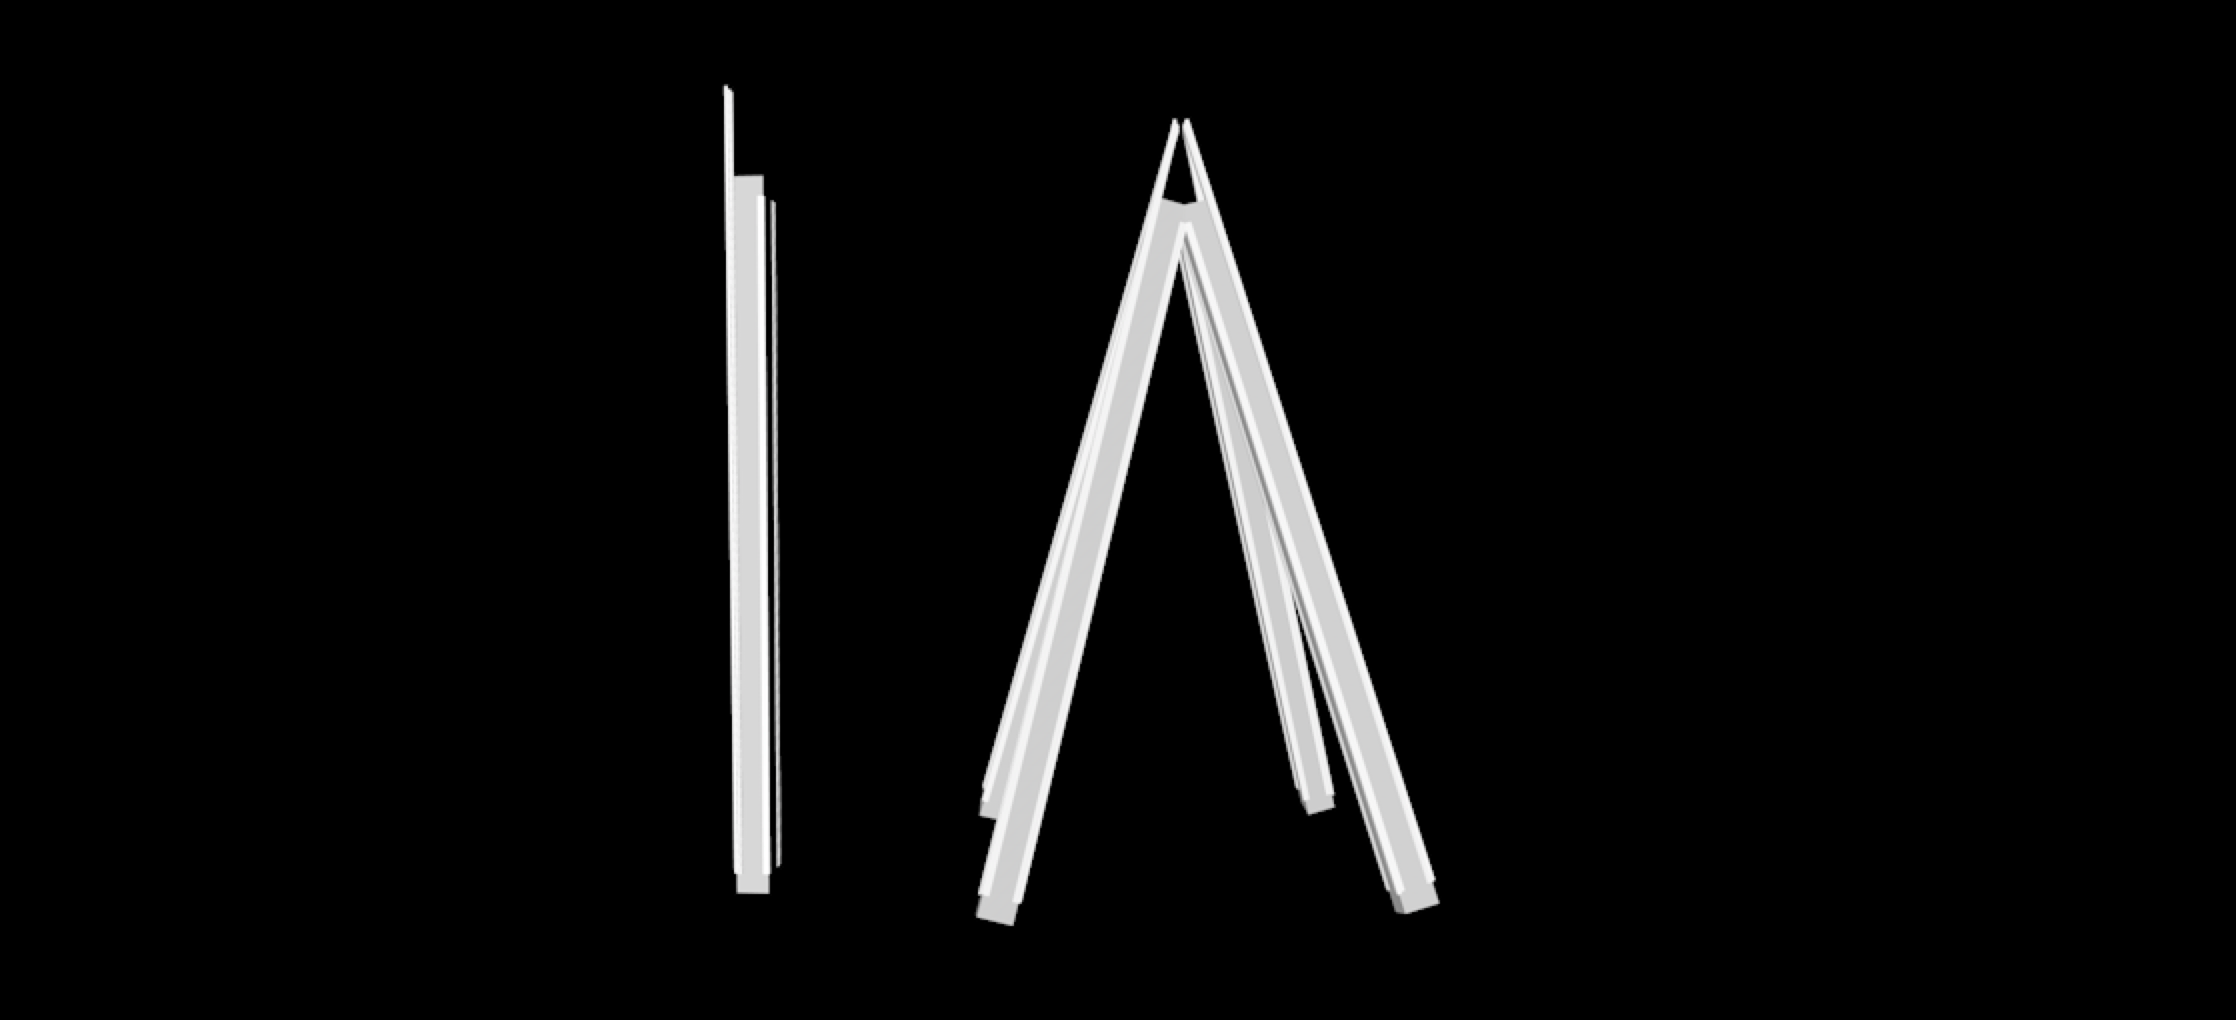
As you can see, one side has to be longer to meet with the others to create the tip, the other’s obviously have to be shorter to meet where they need to. After you make one side and put it in the cloner tool, set it to “Radial.” Then go to the transform settings and the rotation section should be set to H = 133.755 °, P = -15°, B = -15°. As you get this part right, move up the roof and finish the pieces that are needed for the Angel Statute to stand on. You can find a free Angel model at https://www.cgtrader.com/free-3d-models/character-people/fantasy/lucy-a-christian-angel-statue. You should get a roof that looks like this:
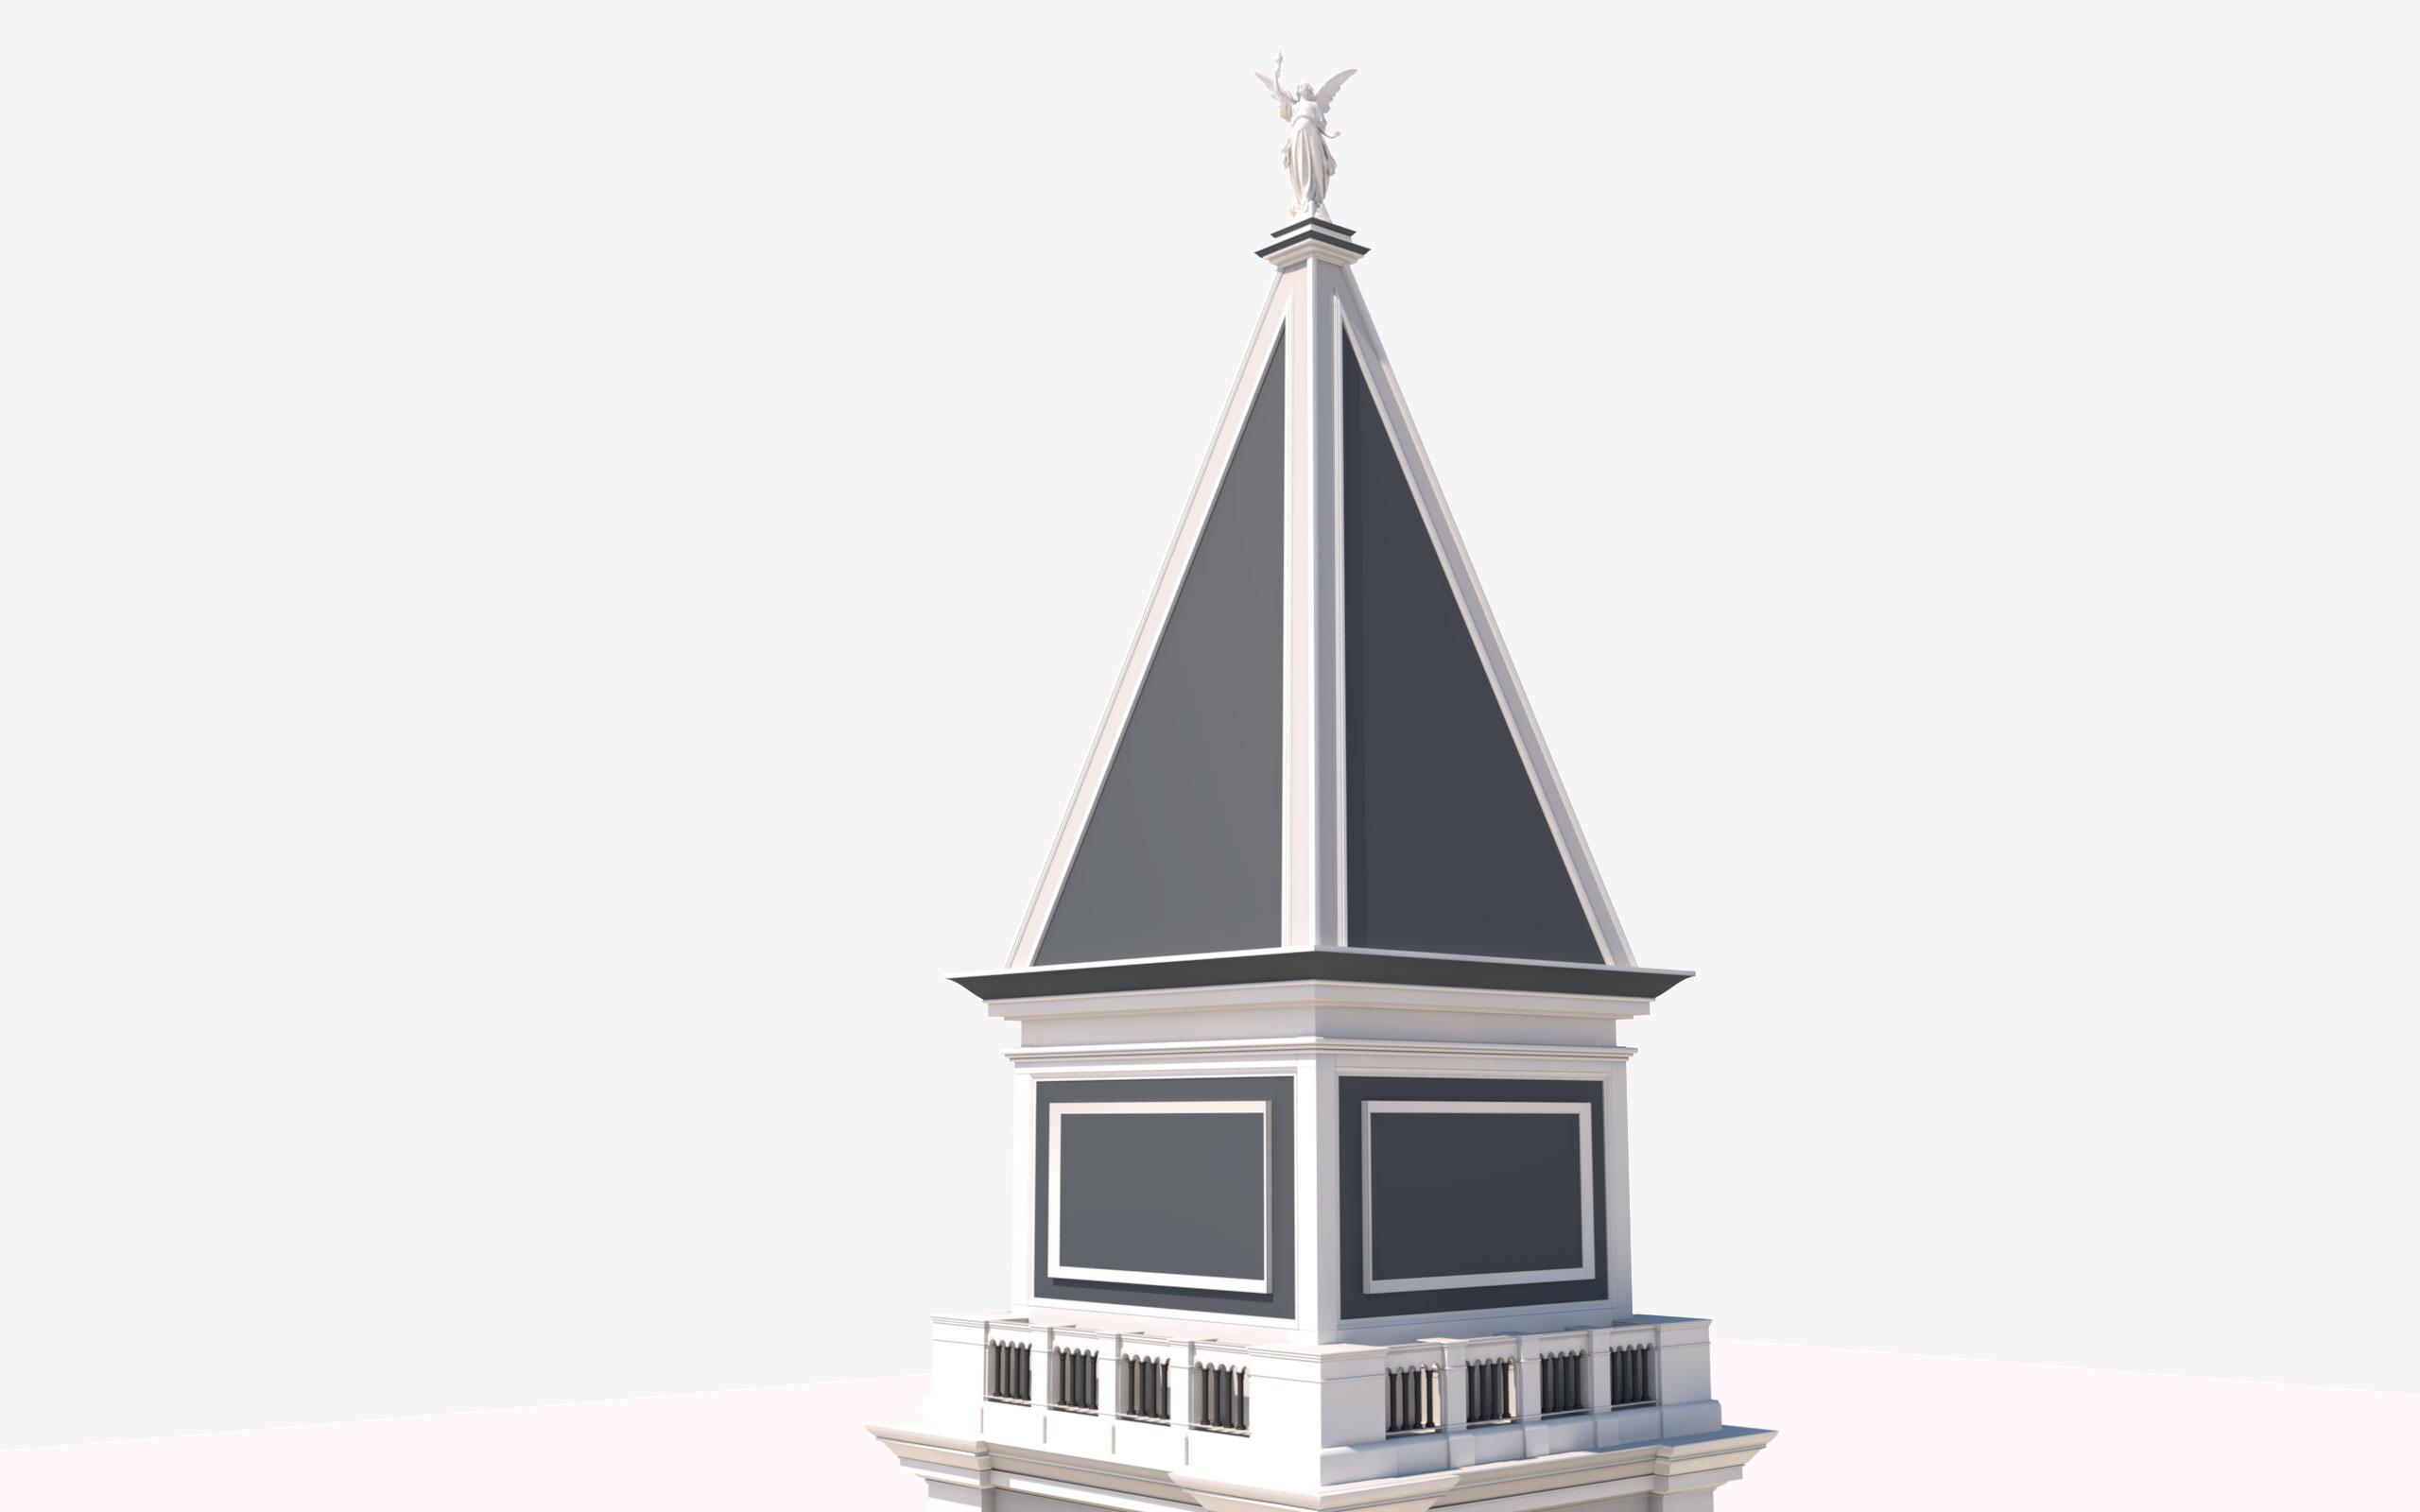
And there you have it! We just made a pretty cool tower in Cinema. In the 2nd part of this tutorial we will texture the tower so you can make it look real(ish) and Instagram it. At least, that’s what I did. Stay tuned.